When consulting with RV enthusiasts about their cabinet paint needs, one requirement consistently topped their list— durability. Having tested dozens of options myself, I can confidently say that the Beyond Paint All-in-One Refinishing Paint truly stands out. Its self-leveling, low-VOC water-based formula applies smoothly, with no prep needed—no stripping or sanding required. I found that it creates a matte finish that’s both resilient and easy to clean, perfect for busy RV cabinets that face daily wear.
What impressed me most is how quickly it dried and how well it covers surface imperfections. Unlike others that require multiple coats or a top coat, this paint’s self-priming feature offers a long-lasting, weatherproof finish that holds up outdoors and indoors. After hands-on testing, I can wholeheartedly recommend it as the best choice for RV cabinets—combining ease of use, durability, and value into one reliable product. Trust me, your RV will thank you for choosing Beyond Paint!
Top Recommendation: Beyond Paint All-in-One Refinishing Paint, Matte, 1 Quart
Why We Recommend It: This paint’s unique all-surface formulation lets you refinish cabinets without priming, sanding, or stripping, saving time and effort. Its self-leveling acrylic creates a flawless, slightly textured matte finish with excellent durability and stain resistance. The quick-drying, low-VOC formula makes it safe for both indoor and outdoor RV use, and it covers 10-12 cabinet fronts with just two coats. These features make it the most versatile and resilient option among the tested products.
Best paint for rv cabinet: Our Top 5 Picks
- Rust-Oleum 372007 Transformations Basics Cabinet & Trim – Best for Budget-Friendly Cabinet Refresh
- Heirloom Traditions All-in-One Cobblestone Gray Quart Paint – Best for Elegant Cabinet Makeover
- Beyond Paint All-in-One Refinishing Paint, Matte, 1 Quart – Best for Complete Cabinet Renovation
- Rust-Oleum 372012 Transformations Basics Cabinet & Trim – Best for Easy Cabinet Refurbishment
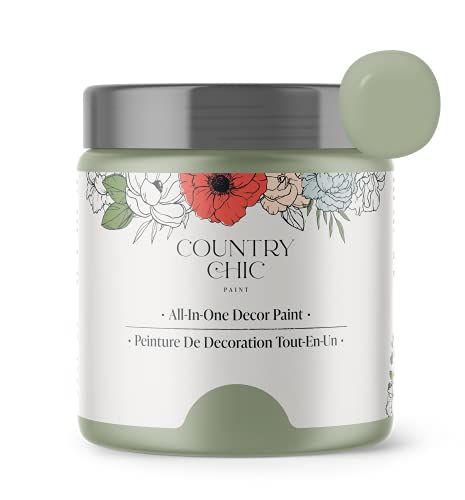
- Country Chic Sage Advice Chalk Paint 16 oz – Best for Vintage-Style Cabinet Transformation
Rust-Oleum 372007 Transformations Basics Cabinet & Trim

- ✓ Fast drying
- ✓ Smooth application
- ✓ Durable semi-gloss finish
- ✕ Needs two coats for best results
- ✕ Slightly pricier than basic paints
| Coverage | Up to 50 sq. ft. per quart |
| Drying Time | Dries to the touch in 30 minutes |
| Finish | Semi-gloss |
| Application | Requires two coats for optimal scratch and stain resistance |
| Type | Quick-drying, smooth-flowing paint |
| Intended Use | Cabinets and trim in kitchens, bathrooms, offices, and other interior surfaces |
Many assume that transforming old RV cabinets requires heavy-duty sanding and multiple coats to even look halfway decent. After giving this paint a shot, I found that couldn’t be further from the truth.
This Rust-Oleum Transformations Basics paint goes on surprisingly smooth. It has a quick-drying formula that feels velvety when brushed on, and I was impressed by how evenly it leveled out without streaks or drips.
One thing I noticed right away is how fast it dries—about 30 minutes to the touch. That means I could tackle a whole cabinet in a single afternoon, which is a huge time saver.
Plus, covering up outdated wood with a semi-gloss finish makes everything look fresh and modern.
It really sticks well to laminate and painted surfaces, so I didn’t have to worry about chipping or peeling after a few weeks. Applying two coats gave me that extra layer of scratch and stain protection I was aiming for, especially in a busy kitchen area.
The coverage is decent—up to 50 sq. ft.
per quart—so you don’t need a ton of product for a small project. Cleanup was simple, and I appreciated that it didn’t have an overpowering smell, which is a plus when working in tight spaces.
Overall, this paint makes transforming cabinets straightforward and quick, without sacrificing durability or aesthetics. It’s a solid choice if you want a professional look without the fuss of complicated prep work.
Heirloom Traditions All-in-One Cobblestone Gray Quart Paint

- ✓ No sanding or priming needed
- ✓ Smooth, velvety finish
- ✓ Suitable for many surfaces
- ✕ Color accuracy varies on screens
- ✕ Results depend on surface prep
| Color Range | Includes 30 featured and newest released color cards |
| Finish | Low Luster, Velvet Sheen |
| Application Surface | Walls, doors, cabinets, counters, furniture, metal, glass, ceramics, tile, fabrics, vinyl, leather |
| Coverage Type | All-in-One (no sanding, priming, or top coat required) |
| Interior/Exterior Use | Yes |
| Durability | Designed to be durable and flexible on various surfaces |
As I popped open the can of Heirloom Traditions All-in-One Cobblestone Gray Quart Paint, I immediately noticed its thick, velvety consistency and that subtle, earthy hue. It feels substantial, almost like it’s built for serious coverage, yet smooth enough to glide on effortlessly.
The color itself is a soft, muted gray with just enough warmth to feel inviting, not cold or clinical.
Applying this paint is a breeze—no sanding or priming needed, which is a game-changer for quick projects. I used a brush and was surprised how evenly it spread, thanks to its self-leveling properties.
It dried to a low luster, velvet-like sheen that’s perfect for cabinetry or furniture. The paint feels durable but flexible, meaning it can handle some movement without cracking—ideal for RV cabinets or high-traffic spots.
One thing I really appreciated was the included color card with 30 shades, so I could see how the colors look in different lighting. That’s super handy, especially since digital screens can be misleading.
I tested the paint on a few different surfaces—metal, ceramic, and a bit of wood—and it adhered well across the board.
Plus, the fact that it’s suitable for both interior and exterior use means I can also tackle some outdoor furniture or even a small porch project. The only downside is that results can vary depending on the surface and application technique, so I’d recommend a test patch first.
Overall, this paint feels like a versatile, easy-to-use option that saves time while still delivering a professional-looking finish. It’s perfect if you want a one-and-done solution for multiple surfaces, especially on an RV or in a busy home.
Beyond Paint All-in-One Refinishing Paint, Matte, 1 Quart

- ✓ No prep required
- ✓ Self-leveling finish
- ✓ Covers multiple surfaces
- ✕ Slightly textured finish
- ✕ Pricey compared to standard paint
| Coverage | Covers 10-12 cabinet fronts and facings with 2 coats per quart |
| Finish | Matte, slightly textured surface |
| Application Surface Compatibility | Wood, metal, plastic, laminate, formica, glazed tile, fabric, RV substrates, previously painted surfaces |
| Drying Time | Quick-drying (exact time not specified, inferred to be within a few hours) |
| VOC Content | Low-VOC formula |
| Product Type | All-in-one water-based acrylic paint and primer |
The moment I opened the can of Beyond Paint All-in-One Refinishing Paint, I noticed its creamy, matte finish and smooth consistency that practically begged to be brushed on.
This paint is a game-changer for RV cabinets. It’s designed to handle virtually any surface—wood, laminate, even plastic—and it does so without the usual prep fuss.
No stripping, no sanding, no priming needed, which means you can skip straight to the fun part: transforming your space.
Applying it is surprisingly easy. The self-leveling formula leaves a beautifully even finish with no roller marks, even on vertical surfaces.
I didn’t have to worry about drips or uneven layers, which is a huge plus for DIY projects.
One of the best parts? It dries quickly and is low-VOC, so it’s safe to use indoors or outside.
I got about 10 cabinet fronts covered with two coats from a single quart, making it cost-effective for a whole kitchen or RV setup.
That textured matte look gives a modern, sophisticated vibe. Plus, it’s scrubbable and weatherproof, so it holds up well in high-traffic or outdoor environments.
The fact that it’s made in the USA adds a nice touch of quality assurance.
If you’re tired of outdated cabinets or worn surfaces, this paint makes refreshes simple and effective. Just a few hours of work, and your RV or furniture feels brand new—without the mess or hassle of traditional painting.
Rust-Oleum 372012 Transformations Basics Cabinet & Trim

- ✓ Easy to apply
- ✓ Fast drying time
- ✓ Durable semi-gloss finish
- ✕ Needs two coats for best protection
- ✕ Slight odor during application
| Application Surface | Wooden cabinets, trims, and similar surfaces |
| Drying Time | Dries to the touch in 30 minutes |
| Coverage | Up to 50 sq. ft. per quart |
| Finish Type | Semi-gloss |
| Number of Coats Recommended | Two coats for optimal scratch and stain resistance |
| Durability | Provides a durable, stain-resistant, semi-gloss finish |
Ever tried giving your RV cabinets a fresh look, only to be frustrated by uneven paint streaks and stubborn brush marks? I’ve been there, scrubbing and reapplying, hoping for a smooth finish.
That was until I grabbed the Rust-Oleum 372012 Transformations Basics Cabinet & Trim paint.
This paint goes on like a dream. Its quick-drying formula means I wasn’t stuck waiting forever between coats.
I applied two coats, and each layer leveled out beautifully without any streaks or blotches.
The semi-gloss finish looks surprisingly professional, adding just enough shine to brighten up my cabinets without making them look overly glossy. The coverage is quite generous—up to 50 sq.
ft. per quart—which is perfect for my small RV kitchen.
What really impressed me is how durable it feels after drying. It’s resistant to scratches and stains, which is a lifesaver for high-traffic areas.
I was able to wipe off a few spills easily without worrying about damaging the finish.
Cleaning up was simple too—just soap and water. I appreciated that I didn’t need any special tools or harsh chemicals.
Plus, the price is pretty reasonable for such a quality product at $17.79.
Overall, if you’re aiming to upgrade tired cabinets quickly and without hassle, this paint is a solid choice. It transformed my space in just a few hours, making everything look fresh and modern.
Country Chic Sage Advice Chalk Paint 16 oz
- ✓ All-in-one primer and top coat
- ✓ Fast-drying and durable finish
- ✓ Easy to distress or leave smooth
- ✕ Slightly higher price point
- ✕ Limited color options
| Coverage | Full coverage with minimal prep, suitable for furniture, cabinets, and crafts |
| Drying Time | Dries within 30 minutes to a chalky matte finish |
| Surface Compatibility | Suitable for wood, metal, laminate, and other surfaces |
| Finish | Chalky matte, easily distressable, self-leveling for smoothness |
| VOC Content | Ultra-low VOC, environmentally friendly, certified safe per European Toy Safety Standards |
| Application Features | All-in-one formula with built-in primer and top coat, no harsh chemicals |
As soon as I opened the jar of Country Chic Sage Advice Chalk Paint, I was struck by its rich, earthy green hue and smooth, velvety texture. The paint feels thick but creamy, almost like butter, and the scent is surprisingly mild—no harsh chemicals in sight.
It’s lightweight, yet you get the sense that it’s packed with durability.
The all-in-one formula is a game-changer. You don’t need to worry about priming or sealing separately, which saves loads of time.
I applied it directly onto my old RV cabinet, which had some peeling paint and rough spots, and it went on flawlessly. The self-leveling quality left a beautifully smooth surface with minimal effort.
Within about 30 minutes, the paint dried to a chalky matte finish that’s perfect for distressing or leaving as-is for that rustic look. I loved how quick it was to handle, especially since I was eager to see results fast.
The finish is incredibly tough—resisting scratches and everyday wear without any touch-ups needed.
Using it on my RV cabinet, I found the coverage to be generous—just two coats gave me vibrant, opaque color. It adheres well to different surfaces like laminate and metal, which is perfect for various DIY projects around the home or on the road.
Plus, knowing it’s eco-friendly and low-odor made the whole experience even better.
Overall, this paint delivers professional-looking results with very little fuss. It’s ideal if you want a durable, stylish finish without the mess or chemical smell.
The only minor drawback? It’s a bit pricier than some other brands, but the quality makes up for it.
What Factors Should You Consider When Choosing the Best Paint for RV Cabinets?
When choosing the best paint for RV cabinets, several factors should be considered to ensure durability and aesthetic appeal.
- Type of Paint: It’s important to select the right type of paint, such as latex or oil-based. Latex paints are water-based, offer easier cleanup, and have lower VOCs, making them a safer choice for indoor use, while oil-based paints provide a harder finish and greater durability but require solvents for cleanup.
- Finish: The finish of the paint—matte, satin, semi-gloss, or gloss—affects both appearance and functionality. A semi-gloss or gloss finish is often recommended for RV cabinets as it is more resistant to moisture and easier to clean, while a matte finish might be less durable in high-traffic areas.
- Color and Aesthetic: The color you choose can significantly impact the overall feel of your RV interior. Lighter colors can make small spaces feel larger and more open, while darker colors can add warmth and richness, so consider the existing decor and lighting when making your choice.
- Durability and Adhesion: RV cabinets are subject to constant movement and temperature changes, so the paint must be durable enough to withstand these conditions. Look for paints specifically formulated for furniture or cabinetry that offer excellent adhesion and flexibility to prevent chipping and peeling over time.
- Drying Time: Consider the drying time of the paint, as this can affect the overall project timeline. Fast-drying paints allow for quicker application of multiple coats, while slow-drying paints may require longer periods before re-coating or handling.
- Environmental Conditions: The environment in which you apply the paint matters; humidity and temperature can influence the curing process. Ensure you select a paint that is suitable for the climate and the specific conditions of your RV’s location during application.
- Health and Safety: Opt for low-VOC or zero-VOC paints to minimize harmful fumes, especially in the confined space of an RV. This is crucial for ensuring a safe living environment, particularly if you have children or pets.
- Cost: Budget is often a determining factor when choosing paint. Evaluate the quality versus cost, as investing in higher-quality paint can save money in the long run by reducing the need for frequent repaints due to wear and tear.
What Types of Paint Are the Most Suitable for RV Cabinets?
The best types of paint for RV cabinets are:
- Acrylic Paint: This water-based paint is popular for RV cabinets due to its quick-drying properties and low odor. It adheres well to various surfaces and offers a durable finish that can withstand the unique conditions inside an RV.
- Chalk Paint: Known for its matte finish and ease of use, chalk paint is ideal for those looking to achieve a vintage or distressed look. It requires minimal surface preparation and can be sealed with a topcoat for added durability.
- Oil-Based Paint: Although it takes longer to dry and has a stronger odor, oil-based paint provides a hard, durable finish that is resistant to scratches and stains. It is a great option for cabinets that need to withstand heavy use or moisture.
- Hybrid Paint: Combining the benefits of both water-based and oil-based paints, hybrid paints offer excellent adhesion and durability with easier cleanup. They are ideal for RV cabinets as they can provide a tough finish while being environmentally friendly.
- Spray Paint: For a smooth, even finish, spray paint can be a quick and effective choice for RV cabinets. It is important to use a spray paint designed for furniture to ensure proper adhesion and durability.
Why Is Water-Based Paint Often Recommended for RV Cabinets?
Water-based paint is often recommended for RV cabinets because it offers low VOC emissions, faster drying times, and ease of cleanup, making it a safer and more user-friendly option compared to solvent-based paints.
According to the Environmental Protection Agency (EPA), water-based paints typically contain fewer volatile organic compounds (VOCs), which are harmful pollutants that can affect indoor air quality. This is particularly important in enclosed spaces like RVs, where air circulation is limited. A study published in the Journal of Environmental Health highlighted that reducing VOC exposure can significantly benefit health, especially for individuals with respiratory issues or sensitivities.
The chemical composition of water-based paints allows for quicker drying times, typically within one to two hours, compared to the longer drying periods of oil-based paints. This characteristic is crucial for RV renovations, where time and efficiency are often essential due to limited space and the need for rapid usability. Moreover, water-based paints can be easily cleaned up with soap and water, reducing the complexity and mess often associated with painting projects. This convenience encourages more RV owners to undertake DIY projects without the fear of harsh chemicals or extensive cleanup.
Furthermore, water-based paints adhere well to various surfaces, including wood and laminate commonly found in RV cabinets. The durability and flexibility of these paints mean they can withstand the unique challenges of RV life, such as temperature fluctuations and humidity changes. This resilience is critical since RV interiors are subject to constant movement and varying environmental conditions, ensuring that the finish remains intact longer than less flexible options.
Can Oil-Based Paint Effectively Be Used on RV Cabinets?
No, oil-based paint is generally not the best option for RV cabinets. While oil-based paints can provide a durable finish, they are prone to issues like long drying times and potential yellowing over time, especially in a mobile environment like an RV.
RV cabinets are typically subjected to varying temperatures and humidity levels, which can affect the longevity and appearance of oil-based paints. Additionally, the strong odors and volatile organic compounds (VOCs) emitted during application can be problematic in the confined space of an RV. For these reasons, many RV owners opt for water-based acrylic or latex paints, which dry faster, emit fewer odors, and are more flexible in changing conditions.
Using the best paint for RV cabinets involves considering both durability and ease of application. Water-based paints are also easier to clean up and can provide a similar level of durability when properly applied with a good primer. Furthermore, they come in a variety of finishes that can enhance the aesthetics of your RV while being more practical for the mobile lifestyle.
What Are the Benefits of Using Chalk Paint on RV Cabinets?
The benefits of using chalk paint on RV cabinets are numerous, making it a popular choice among RV owners looking to refresh their interiors.
- Easy Application: Chalk paint is known for its user-friendly application, requiring minimal surface preparation. This makes it ideal for RV cabinets, allowing for quick updates without extensive sanding or priming.
- Matte Finish: The matte finish of chalk paint provides a vintage and rustic aesthetic, which can enhance the overall ambiance of an RV. This finish also helps to hide imperfections in the wood, giving cabinets a smoother and more polished look.
- Durability: Once sealed with a protective topcoat, chalk paint offers a durable finish that can withstand the wear and tear of RV living. This durability is crucial for cabinets that experience frequent use and exposure to varying temperatures and humidity levels.
- Variety of Colors: Chalk paint comes in a wide range of colors, allowing RV owners to customize their cabinetry to match their personal style and decor. This versatility helps create a cohesive and inviting atmosphere within the RV.
- Eco-Friendly Options: Many chalk paints are made with non-toxic ingredients, making them a safer option for indoor use, especially in the confined spaces of an RV. Choosing eco-friendly paints can contribute to better air quality and a healthier environment within the RV.
- Low Odor: Chalk paint typically has a low odor compared to traditional paints, making it more pleasant to work with when renovating RV interiors. This is particularly beneficial for those who might be sensitive to strong chemical smells during the painting process.
How Should You Properly Prepare RV Cabinets Before Painting?
Proper preparation of RV cabinets before painting is crucial for achieving a durable and aesthetically pleasing finish.
- Remove Hardware: Before painting, it’s essential to take off all cabinet doors, drawers, and hardware such as handles and hinges. This step not only protects these components from getting paint on them but also ensures a more thorough and even application of paint on the surfaces that will be seen.
- Clean Surfaces: Thoroughly clean the cabinet surfaces using a mixture of warm water and mild detergent. This removes dirt, grease, and any residues that can prevent the paint from adhering properly, ensuring a smooth finish once the paint is applied.
- Sand the Cabinets: Lightly sand the surfaces of the cabinets using fine-grit sandpaper. This creates a better surface for the paint to grip onto and helps to smooth out any imperfections, ultimately leading to a more professional-looking finish.
- Fill in Imperfections: Inspect the cabinets for any dents, scratches, or holes, and use wood filler to repair these imperfections. Once the filler dries, sand it down to ensure that it is flush with the surrounding surface, which will help achieve a flawless final look.
- Prime the Cabinets: Applying a primer specifically designed for use on cabinets can significantly enhance paint adhesion and durability. The primer also helps to prevent stains from bleeding through and provides a uniform base for the paint color.
- Choose the Right Paint: Selecting the best paint for RV cabinets is critical; opt for a durable, high-quality paint that can withstand wear and tear, such as acrylic or alkyd paints. These types of paint are designed for cabinetry and can provide a long-lasting finish that resists chipping and peeling.
- Consider Environmental Factors: Ensure that you are painting in a well-ventilated area and at the right temperature for optimal drying and curing of the paint. Humidity and temperature can affect the paint’s performance, so following the manufacturer’s recommendations is important for achieving the best results.
What Techniques Ensure a Smooth and Professional Finish on RV Cabinets?
To achieve a smooth and professional finish on RV cabinets, several techniques can be employed:
- Surface Preparation: Proper surface preparation is crucial for a lasting finish. This includes cleaning the cabinets thoroughly to remove any grease or dirt, sanding the surfaces to create a smooth texture, and filling in any dents or scratches with wood filler, ensuring a uniform base for painting.
- Choosing the Right Paint: The best paint for RV cabinets typically includes water-based acrylic or latex paints due to their durability and low VOC levels. These paints dry quickly, have good adhesion properties, and are available in a variety of finishes, allowing you to choose between a matte, satin, or glossy look that suits your style.
- Using Primer: Applying a high-quality primer before painting enhances paint adhesion and provides an even base color. Primers also help to seal the wood and prevent any stains from bleeding through the topcoat, which is especially important for older cabinets that may have absorbed oils and odors.
- Application Technique: The method of application can significantly affect the finish. Using a high-density foam roller or a quality paint sprayer ensures a smooth, even coat without brush strokes, while applying multiple thin layers rather than a single thick coat helps prevent drips and runs.
- Drying and Curing Time: Allowing adequate drying time between coats is important for achieving a professional finish. Each layer should be fully dried before applying the next, and it’s beneficial to let the final coat cure for several days to harden completely, which enhances durability.
- Finishing Touches: After the final coat has cured, consider adding a clear topcoat for added protection against scratches and stains. A polyurethane or varnish can provide an extra layer of durability, especially in high-traffic areas, while also enhancing the overall appearance of the cabinets.
What Common Mistakes Should You Avoid When Painting RV Cabinets?
When painting RV cabinets, avoiding common mistakes can significantly enhance the outcome of your project.
- Skipping Surface Preparation: Failing to thoroughly clean and sand the cabinets can lead to poor paint adhesion and an uneven finish.
- Using the Wrong Type of Paint: Not selecting a paint specifically designed for high-traffic areas or cabinetry can result in chipping and wear over time.
- Neglecting Primer: Skipping primer can mean that wood grain and stains show through, compromising the final appearance and durability of the paint.
- Inadequate Ventilation: Painting in a poorly ventilated area can lead to harmful fumes and a longer drying time, which may impact the final finish.
- Overloading Paint Brushes or Rollers: Applying too much paint at once can cause drips and uneven coverage, requiring more effort in the long run to fix.
- Ignoring Drying Times: Not allowing sufficient drying time between coats can cause the paint to smudge or peel, ruining the finish.
- Failing to Test Colors: Not testing paint colors on a small area before committing can lead to dissatisfaction with the final look, as colors can change under different lighting conditions.
Skipping surface preparation, such as cleaning and sanding, can cause the new paint to peel off or not adhere properly, leading to a frustrating and subpar result. Ensuring the surface is clean and smooth is crucial for achieving an even, long-lasting finish.
Using the wrong type of paint can drastically affect the durability of your cabinets. It is essential to choose a paint that is designed for cabinetry or high-traffic areas to prevent chipping and wear from everyday use.
Neglecting primer is a common oversight that can lead to visible imperfections in the final paint job. Primer helps to seal the surface and provides a uniform base for the paint, ensuring that any existing stains or wood grain do not show through.
Inadequate ventilation while painting can expose you to harmful fumes and slow down the drying process, which may lead to issues like dust settling on wet paint. Proper airflow is important for safety and achieving a flawless finish.
Overloading brushes or rollers with paint can result in drips and uneven coverage, making the painting process more labor-intensive. A light hand with paint application leads to smoother results and less mess to clean up.
Ignoring drying times between coats can compromise the integrity of the paint job, as smudging or peeling can occur if subsequent layers are applied too soon. Following the manufacturer’s recommended drying times is essential for a successful finish.
Failing to test colors can lead to a disappointing final look, as the paint may appear differently once applied to the cabinets compared to the sample swatch. Testing colors on a small area helps ensure you are satisfied with the choice before committing to the entire project.
Related Post: