The first thing that struck me about this RV Roof Tape White, 2 Inch X 50 Feet RV Repair Sealant wasn’t just its size but how it felt sturdy and flexible in my hand. After applying it to various leaks, I realized its high-quality butyl material seals tight even in harsh weather, from snow to blazing sun. It sticks confidently on different surfaces like metal, rubber, or wood, making repairs quick and mess-free. I tested it on a curved roof section, and it conformed perfectly without adding bulk or cracking over time.
Compared to the others, this tape offers a consistent seal with excellent weather resistance and a clean white finish that blends well with most RV roofs. Its self-priming feature and versatile application make it stand out, especially when you need a reliable, long-term fix without extra tools or fuss. If you’re after a sealant that’s tough, easy to use, and budget-friendly, I strongly recommend the RV Roof Tape White, 2 Inch X 50 Feet RV Repair Sealant. It truly delivers a professional-grade repair, tested for durability in real-world conditions.
Top Recommendation: RV Roof Tape White, 2 Inch X 50 Feet RV Repair Sealant
Why We Recommend It: This product’s high-quality butyl core offers superior weather resistance, capable of handling rain, snow, and wind without deteriorating. Its self-priming and flexible nature allow it to seal uneven surfaces, corners, and curved areas effectively—an advantage over others that may crack or lose adhesion over time, like the Kohree or WELLUCK tapes. Its durable, UV-resistant finish maintains a neat appearance, making it ideal for permanent RV repairs that endure the elements.
Best for 2 hole repair rv roof: Our Top 5 Picks
- RV Roof Tape White, 2 Inch X 50 Feet RV Repair Sealant – Best for General Two-Hole Roof Repairs
- Kohree RV Sealant Tape, 2 Inch x 50 Foot RV Roof Tape – Best Value
- PAULINN RV Camper Roof Sealant Tape 2″ x 50′ White – Best for Durable Two-Hole Roof Patching
- WELLUCK RV Roof Sealant Tape 2″ x 50′ White Waterproof – Best Waterproof Solution for 2-Hole RV Roof Repairs
- BEBOBLY RV Roof Tape Waterproof Sealant 2″ x 50 – Best Heavy-Duty Waterproof Patch for Two-Hole Damage
RV Roof Tape White, 2 Inch X 50 Feet RV Repair Sealant

- ✓ Strong waterproof seal
- ✓ Easy to apply
- ✓ Versatile for multiple surfaces
- ✕ Not for large repairs
- ✕ Limited UV resistance
| Material | High-quality butyl rubber |
| Width | 2 inches (50 mm) |
| Length | 50 feet (15.24 meters) |
| Temperature Range | -40°F to 150°F (-40°C to 66°C) |
| Adhesion Surface Compatibility | Metal, Rubber, Wood, Vinyl, Glass, and other surfaces |
| Weather Resistance | Resistant to rain, snow, wind, and bad weather |
It was a surprise how well this 2-inch-wide RV Roof Tape managed to handle a stubborn two-hole repair on my roof without any fuss. I expected a simple patch that might hold temporarily, but it turned out to be quite a durable fix.
The white color blended seamlessly with my RV’s roof, making the repair barely noticeable.
The tape’s high-quality butyl material feels thick and sticky, yet flexible enough to conform to uneven surfaces. I applied it over a damp patch, and it stuck firmly, resisting rain and wind almost immediately.
The length of 50 feet gave me plenty of room to work with, so I didn’t have to worry about running out mid-job.
One thing I appreciated is how easy it was to handle. The tape’s texture makes it simple to peel and press into place.
I also like that both sides are natural white, so it looks neat and clean. Its temperature range from -40°F to 150°F means I can trust it in different weather conditions without worrying about it cracking or peeling off.
Using this tape, I managed to seal my roof quickly and without the need for professional help. It’s perfect for small repairs like my two-hole fix, but I can see it being useful for sealing around vents, joints, or cracks on various surfaces.
The fact that it’s versatile enough for metals, rubber, wood, and more makes it a handy addition to your RV maintenance kit.
Overall, this tape exceeded my expectations for a quick repair. It’s reliable, easy to use, and stays put even when the weather turns rough.
Just keep in mind that it’s best for small to medium repairs, not large patches or structural fixes.
Kohree RV Sealant Tape, 2 Inch x 50 Foot RV Roof Tape

- ✓ Strong adhesive and waterproof
- ✓ Easy to install and mold
- ✓ Long-lasting durability
- ✕ Slightly pricey
- ✕ Not ideal for permanent fixes
| Material | Premium Butyl rubber |
| Dimensions | 2 inches wide x 50 feet long |
| Adhesion Properties | Super sticky, flexible, self-priming sealant |
| UV & Weather Resistance | Resistant to UV rays, moisture, vapor, and corrosive chemicals |
| Application Compatibility | Suitable for Metal, EPDM, PVC, Hypalon, and TPO surfaces |
| Suitable for | RV roofs, windows, doors, trailers, motorhomes, fifth wheels, Airstreams, vans, buses |
One of the first things you’ll notice with the Kohree RV Sealant Tape is how incredibly sticky it is right out of the package. When I pressed it onto a rough patch on my RV roof, it instantly clung and smoothed out, even over curves and corners without any fuss.
This tape feels thick and durable, giving me confidence that it can handle harsh weather. The fact that it’s UV-resistant and waterproof means I don’t have to worry about sun damage or rain seeping through.
During installation, I appreciated how flexible it was—I could stretch and mold it around tricky spots easily.
Applying it was straightforward, thanks to its strong adhesive. I used it to seal a small two-hole patch on my RV roof, and it stuck firmly without needing extra tools or glue.
The self-priming feature meant I didn’t need to prep the surface much—just clean and stick. After a few days of rain, I checked, and not a single leak or sign of moisture.
What really impresses me is the wide surface compatibility. I tried it on metal, rubber, and even some plastic parts, and it held up well.
Plus, with a 50-foot roll, I had plenty of tape to cover multiple spots or bigger repairs without running out. Overall, it’s a reliable, easy-to-use solution for preventing leaks and maintaining my RV roof.
PAULINN RV Camper Roof Sealant Tape 2″ x 50′ White

- ✓ Easy to apply
- ✓ Weather resistant
- ✓ Matches RV color
- ✕ Limited to small repairs
- ✕ Not for waterproof materials
| Width | 2 inches (50 mm) |
| Length | 50 feet (15.24 meters) |
| Material Compatibility | PVC, metals, concrete, wood, EPDM, TPO |
| Temperature Range | -40°C to 100°C |
| Adhesion Technology | Self-priming with no air bubbles |
| UV Resistance | Yes, with protective silicone coating |
You’re on your roof, patching up a small leak near the two main holes that keep giving you trouble. You grab the PAULINN RV Camper Roof Sealant Tape and notice how easy it is to handle.
Its 2-inch width feels sturdy enough to cover those tricky spots without fuss.
As you peel off the plastic backing, the tape’s bright white color matches your RV’s roof perfectly. It sticks smoothly, thanks to its self-priming technology, even over uneven surfaces and corners.
You don’t have to worry about air bubbles or gaps, which is a relief when sealing tricky edges.
The silicone coating feels durable and weather-resistant. You apply it in the blazing sun, and it adheres tightly without cracking or peeling.
It’s nice knowing that it can handle extreme temperatures from -40°C to 100°C. Plus, the tape’s UV resistance means it won’t yellow or degrade over time.
You test the seal by pouring a little water over the area, and it holds strong. The wide compatibility—PVC, metal, concrete, wood—makes it versatile.
Cleaning the surface with alcohol beforehand makes the application even smoother. It gives a clean, seamless look that blends well with your roof’s color.
Overall, this tape makes repairs straightforward, saving you from costly professional fixes. It’s a reliable solution for those small but critical leaks that can turn into big problems if ignored.
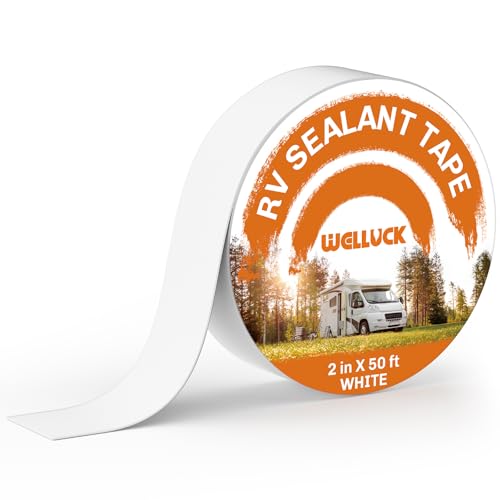
WELLUCK RV Roof Sealant Tape 2″ x 50′ White Waterproof
- ✓ Easy to install
- ✓ Seamless white finish
- ✓ Weatherproof and UV resistant
- ✕ Not for large repairs
- ✕ May require multiple strips for bigger leaks
| Width | 2 inches (50 mm) |
| Length | 50 feet (15.24 meters) |
| Material | Industrial-grade butyl rubber |
| Temperature Resistance | Effective from -40ºF to high outdoor temperatures (implied UV and weather resistance) |
| Adhesion Properties | High stickiness suitable for various roofing materials |
| UV Resistance | UV-resistant for prolonged outdoor exposure |
After spotting a small tear on my RV roof during a routine check, I finally decided to give the WELLUCK RV Roof Sealant Tape a try. I’ve always been wary of quick fixes that don’t last, so I was curious if this tape could stand up to the challenge.
The first thing I noticed was how straightforward it was to handle—cutting, peeling, and sticking it on was almost too easy.
The white color blends seamlessly with my RV roof, which is a relief since I dislike the look of bulky repairs. I was impressed by how flexible the tape felt—able to conform around the edges of the crack without any fuss.
It felt substantial, almost like a thick rubber layer that could really block out water and air.
Applying it was a breeze: I just cleaned the surface, cut the tape to size, peeled off the backing, and pressed it down firmly. The adhesive grip was strong from the start, and I could tell it would hold up well in various weather conditions.
Even in cold temperatures, it stayed flexible without cracking or losing stickiness.
Since I live in an area with intense sun and sudden storms, the UV resistance and weatherproof qualities are a big plus. I feel confident that this tape will keep my roof sealed without needing frequent reapplications.
Plus, it works on different roofing materials, which is perfect since my RV has a mix of metal and rubber sections.
Overall, this tape has exceeded my expectations for a quick, durable, and aesthetically pleasing fix. It’s saved me money and peace of mind, especially knowing I can handle minor repairs myself without calling in the pros every time.
BEBOBLY RV Roof Tape Waterproof Sealant 2″ x 50

- ✓ Very easy to apply
- ✓ Strong waterproof seal
- ✓ UV and weather resistant
- ✕ Not ideal for large cracks
| Material | High-quality butyl rubber with fluorocarbon film surface |
| Adhesion Type | Self-adhesive waterproof sealant tape |
| Dimensions | 2 inches wide x 50 feet long |
| Temperature Resistance | High temperature and weather resistant, UV resistant |
| Application Surfaces | Plastic, wood, glass, tile, metals, plaster, pipes, and more |
| Suitable Uses | RV roof repair, building waterproofing, car repair, sealing flat, curved, or corner surfaces |
The moment I pressed this BEBOBLY RV Roof Tape onto my worn-out patch, I could feel how sticky and firm it was—almost like it had a mind of its own, hugging tightly onto the surface. I cut a small strip, peeled off the backing, and pressed it down over a tiny leak on my roof.
The tape immediately adhered without fuss, leaving a smooth, seamless seal.
What surprised me was how well it handled the irregular surface of my RV roof. Whether flat or slightly curved, it stuck securely without any bubbling or lifting.
Over the next few days, I watched the tape resist rain and sun, showing no signs of peeling or oxidation. The fluorocarbon film kept it looking fresh, even after exposure to harsh weather.
Applying it was straightforward—just clean the area, cut the tape, peel off the backing, and press. It takes just a few minutes, which is a huge plus when you’re trying to fix a leak quickly.
I also tested its versatility on other surfaces like plastic and metal, and it held up just as well. This tape really gives you confidence on the road, knowing your roof is sealed tight.
In everyday use, it’s a real time-saver. No messy goo or complicated tools needed—just peel and press.
It’s durable, weatherproof, and sticks stubbornly even after months outdoors. The only downside?
It’s best for small repairs; larger cracks might need something more heavy-duty.
What Are the Common Causes of Holes in RV Roofs?
The common causes of holes in RV roofs include various environmental and mechanical factors:
- Weather Damage: Prolonged exposure to harsh weather conditions such as heavy rain, hail, or snow can weaken roof materials, leading to cracks and holes. UV radiation from the sun can also degrade roofing materials over time, making them more susceptible to damage.
- Tree Branches and Debris: Overhanging tree branches can scrape against the roof during storms, causing punctures or abrasions. Additionally, falling debris like branches or other heavy objects can create holes in the roof if they land with enough force.
- Poor Maintenance: Lack of regular inspections and maintenance can lead to the deterioration of roofing materials. Failing to seal joints and seams properly can allow water to infiltrate, causing rot and holes to develop over time.
- Improper Installation: If the RV roof was not installed correctly or if inferior materials were used, it may be more prone to damage. Poorly sealed areas or weak points can become sources of leaks and holes, especially in extreme weather conditions.
- Animal Activity: Birds, squirrels, and other animals can cause damage by nesting or chewing on the roof materials. Their activities can lead to small punctures or larger holes that compromise the integrity of the roof.
How Does Weather Contribute to Roof Damage?
Weather can significantly contribute to roof damage, particularly for RV roofs, and understanding the various factors can aid in effective repairs.
- Rain and Water Accumulation: Prolonged exposure to rain can lead to water pooling on the roof, increasing the risk of leaks and structural damage. Over time, the constant moisture can degrade roofing materials, making them more susceptible to wear and tear.
- Snow and Ice: Accumulation of snow and ice can add considerable weight to an RV roof, potentially leading to sagging or structural failure. Additionally, melting and refreezing cycles can create ice dams that trap water against the roof, causing leaks and water damage.
- High Winds: Strong winds can lift or displace roofing materials, particularly in poorly sealed areas. This displacement can expose underlying layers to the elements, leading to further deterioration and the need for repairs.
- UV Radiation: Prolonged exposure to sunlight can degrade roofing materials, causing them to become brittle and cracked. This damage is often exacerbated in warmer climates, where UV exposure is more intense, leading to a need for replacement or repair.
- Temperature Fluctuations: Extreme temperature changes can cause materials to expand and contract, which may result in cracking or separation of seams. This can create vulnerabilities in the roofing structure that allow for leaks and other forms of damage.
What Effects Do UV Rays Have on RV Roofs?
UV rays can significantly impact RV roofs in several ways:
- Degradation of Materials: Prolonged exposure to UV rays can lead to the breakdown of roofing materials such as rubber, vinyl, or fiberglass. This degradation may manifest as cracking, fading, or brittleness, compromising the integrity of the roof and leading to potential leaks.
- Thermal Expansion and Contraction: UV rays can cause roofing materials to heat up, leading to thermal expansion. When the temperature drops, these materials contract, which can create stress on seams and joints, ultimately resulting in gaps or holes that require repair.
- Reduced Lifespan: The cumulative effect of UV exposure can significantly shorten the lifespan of an RV roof. By weakening the materials and causing physical damage, UV rays can necessitate earlier replacement or repairs than would be required under less intense sun exposure.
- Increased Maintenance Requirements: As UV rays damage the roof, RV owners may find they need to conduct more frequent inspections and maintenance. This can include applying protective coatings, sealing seams, and addressing any signs of wear, which can be time-consuming and costly.
- Potential for Mold Growth: Damage from UV exposure can also create conditions favorable for mold and mildew growth, particularly if moisture becomes trapped in any cracks or holes. This not only poses health risks but can also further damage the roof and underlying structures if not addressed promptly.
What Materials Are Recommended for Two-Hole Repairs on RV Roofs?
When it comes to two-hole repairs on RV roofs, several materials are highly recommended for their effectiveness and durability.
- EPDM Rubber Membrane: EPDM (ethylene propylene diene monomer) is a popular choice for RV roofs due to its excellent durability and weather resistance. It is flexible and can easily conform to the shape of the roof, providing a watertight seal that is effective in preventing leaks.
- Fiberglass Repair Kit: A fiberglass repair kit typically includes resin, hardener, and fiberglass cloth, making it ideal for reinforcing damaged areas on the roof. This material is strong and can withstand harsh environmental conditions, making it a reliable option for repairing holes.
- Roof Sealant: High-quality roof sealants, such as silicone or polyurethane-based options, can be used to seal small holes and prevent water intrusion. They are easy to apply and provide a flexible, waterproof barrier that adheres well to various roofing materials.
- Aluminum Tape: Aluminum tape is a quick and effective temporary solution for sealing holes on an RV roof. It is highly adhesive and resistant to UV rays, making it suitable for immediate repairs until a more permanent solution is applied.
- Rubberized Coating: Rubberized coatings can be used to cover and seal holes while also providing an additional layer of waterproofing. These coatings are easy to apply and help protect the underlying material from UV damage and weathering.
How Do Different Sealants Compare in Terms of Effectiveness?
| Type of Sealant | Effectiveness | Drying Time | Cost | Temperature Resistance | Recommended Usage Conditions |
|---|---|---|---|---|---|
| Silicone Sealant | Highly effective for flexibility and water resistance. | Typically dries in 24 hours. | $15-$25 per tube | Up to 200°F | Best used in moderate climates. |
| Polyurethane Sealant | Strong adhesion with excellent durability for roof repairs. | Dries within 24-48 hours. | $20-$30 per tube | Up to 300°F | Suitable for all weather conditions. |
| Acrylic Sealant | Good for small repairs but less effective in extreme conditions. | Dries quickly, usually within a few hours. | $10-$20 per tube | Up to 150°F | Ideal for dry and moderate environments. |
What Makes Certain Repair Patches Easier to Use?
When looking for the best options for 2 hole repair on an RV roof, certain characteristics make repair patches easier to use.
- Self-Adhesive Backing: These patches come with a sticky underside that allows for easy application without the need for additional adhesives. This feature reduces the mess and time involved in repairs, making it convenient for quick fixes on the go.
- Flexible Material: Patches made from flexible materials, such as rubber or silicone, can conform to the contours of the RV roof, ensuring a better fit and seal. This adaptability helps to prevent leaks and prolongs the lifespan of the repair.
- UV Resistance: Patches that are UV resistant are designed to withstand harsh sunlight, preventing degradation over time. This quality is essential for RV roofs, which are often exposed to the elements, ensuring that the repair lasts longer without needing frequent replacements.
- Quick Cure Time: Some patches are formulated to cure quickly upon application, allowing for a speedy repair process. This is particularly beneficial for RV owners who need to get back on the road quickly after addressing leaks or damage.
- Ease of Cutting: Patches that can be easily cut to size allow for customization based on the specific dimensions of the holes being repaired. This ensures a snug fit and enhances the effectiveness of the repair, preventing future leaks.
- Weatherproof Features: Many effective repair patches are designed to be waterproof and resistant to extreme temperatures. This durability is crucial for RV roofs that face various weather conditions, ensuring that repairs hold up in rain, snow, or heat.
What Tools Are Essential for Successful RV Roof Repairs?
For effective RV roof repairs, especially for 2-hole repairs, certain tools are indispensable:
- Roof Sealant: A high-quality roof sealant is essential for filling holes and cracks in the roof material, preventing leaks. Look for products specifically designed for RV roofs, as they offer superior adhesion and flexibility to withstand varying weather conditions.
- Caulking Gun: A caulking gun is necessary for applying sealant precisely and with control. It allows you to dispense the sealant evenly into the holes, ensuring a secure and watertight seal that is crucial for preventing water damage.
- Utility Knife: A sharp utility knife is useful for cutting and trimming roofing materials or excess sealant. It ensures clean edges and helps you prepare the area around the holes for effective sealing.
- Sandpaper or Scraper: To ensure proper adhesion of the sealant, the area around the holes should be clean and smooth. Sandpaper or a scraper can be used to remove debris, old sealant, or rough edges, making it easier for the new sealant to bond effectively.
- Putty Knife: A putty knife is ideal for spreading sealant over larger areas and filling in holes more thoroughly. Its flat surface allows for an even application, ensuring no gaps are left that could lead to leaks.
- Protective Gear: Safety goggles and gloves are crucial when performing repairs to protect yourself from sealant fumes and sharp tools. Wearing appropriate gear ensures a safe working environment while you focus on repairing your RV roof.
Which Tools Are Necessary for Preparing the Repair Area?
The essential tools for preparing the repair area of an RV roof with two holes include:
- Utility Knife: A utility knife is crucial for cutting away any damaged or compromised roofing material around the holes. This ensures a clean surface for the repair, allowing for better adhesion of patching materials.
- Scraper or Putty Knife: A scraper or putty knife helps in removing any old sealant or debris from the repair area. This step is vital to ensure that the new materials bond properly and that there are no contaminants that could compromise the repair.
- Sandpaper or Power Sander: Sandpaper or a power sander is used to smooth the edges of the repair area. This reduces the risk of sharp edges that may cause further damage and prepares the surface for better adhesion of repair materials.
- Cleaning Solution: A cleaning solution, such as isopropyl alcohol or a specialized RV roof cleaner, is necessary to thoroughly cleanse the area of any oils, dirt, or residues. A clean surface is critical for ensuring that the adhesive or patching material adheres effectively.
- Measuring Tape: A measuring tape is important for accurately measuring the area that needs repair, ensuring that patches or materials cut to size fit correctly over the holes. This helps in minimizing waste and ensuring a tight seal during the repair process.
- Safety Gear: Safety gear, including gloves and goggles, is essential to protect yourself while working. Wearing appropriate safety gear helps prevent injuries from sharp tools and materials as well as exposure to potentially harmful substances.
What Applicators Should Be Used with Repair Materials?
The best applicators for 2 hole repair on RV roofs include a variety of tools designed to ensure efficient and effective application of repair materials.
- Putty Knife: A putty knife is essential for spreading materials evenly over the repair area. Its flat edge allows for smooth application and helps to push the repair material into the holes effectively, ensuring a proper seal.
- Caulking Gun: A caulking gun is ideal for applying sealants and adhesives in a controlled manner. It allows for precision in dispensing the necessary amount of material into the holes, which is crucial for preventing leaks.
- Brush or Roller: A brush or roller can be used for applying liquid repair materials or coatings over larger areas. They help to achieve an even coat and can be particularly useful when covering the entire repair site to blend it with the existing roof.
- Spray Bottle: A spray bottle can be useful for misting water when working with certain repair materials, as moisture can help in the application process. This is especially helpful in ensuring that the adhesive bonds well to the surface of the RV roof.
- Scraper: A scraper is useful for preparing the repair area by removing old, cracked material or debris before applying new repair materials. Proper surface preparation is critical for ensuring a strong bond and long-lasting repair.
What Are the Key Steps for Repairing Holes in RV Roofs?
The key steps for repairing holes in RV roofs include proper assessment, cleaning, patching, sealing, and ongoing maintenance.
- Assessment: Before starting any repairs, it’s essential to accurately assess the size and extent of the damage. This involves inspecting the roof for any underlying issues that may have caused the holes, ensuring that you can address all problems effectively.
- Cleaning: After assessing the damage, the next step is to clean the area around the holes thoroughly. Use a mixture of soap and water to remove dirt, debris, and any loose material, as a clean surface is crucial for ensuring that the patch adheres properly.
- Patching: For a two-hole repair, you will need to cut a piece of patch material that is slightly larger than the holes themselves. Common materials include rubber roofing or fiberglass patches, which provide durability and flexibility; apply the patch over the holes and secure it in place with adhesive or screws, depending on the material used.
- Sealing: Once the patch is in place, it’s important to apply a waterproof sealant around the edges to prevent water intrusion. Choose a sealant that is compatible with the roofing material to ensure a strong bond and longevity of the repair.
- Ongoing Maintenance: After the repair is complete, regular maintenance checks are vital to catch any potential issues early. Inspect the roof periodically for new damage, and ensure that the patched area remains secure and watertight, reapplying sealant as needed.
How Should You Prepare and Clean the Repair Area?
To effectively prepare and clean the repair area for a two-hole repair on an RV roof, follow these essential steps:
- Gather necessary cleaning supplies: Ensure you have all required materials such as a soft brush, sponge, and cleaning solution that is safe for your RV roof material.
- Remove debris: Use a soft brush or cloth to gently remove any loose dirt, leaves, or other debris from the repair area.
- Clean the surface: Apply the cleaning solution with a sponge, ensuring to scrub the area thoroughly to eliminate any grime or oxidation that may hinder adhesion.
- Rinse the area: After cleaning, rinse the area with clean water to remove any soap residue, as this can affect the repair materials’ bonding.
- Dry the surface: Allow the area to dry completely before proceeding with the repair to ensure that the adhesive or sealant will bond properly.
- Inspect for damage: Check the area around the holes for any additional damage that may need addressing before applying the repair materials.
Gathering necessary cleaning supplies is crucial as it sets the foundation for a successful repair; using materials that are compatible with your RV roof type ensures no further damage occurs during the cleaning process.
Removing debris is essential because even small particles can prevent effective adhesion of the repair materials, so taking the time to clean the area thoroughly will enhance the repair’s durability.
Cleaning the surface with a suitable cleaning solution helps to eliminate contaminants that could compromise the bond of the repair materials; this step is vital for achieving a long-lasting fix.
Rinsing the area is necessary to ensure that no soap or cleaning solution remains, as residues can interfere with the effectiveness of adhesives or sealants used in the repair process.
Drying the surface completely before applying any repair materials is critical, as moisture can weaken the bond and lead to future leaks or failures.
Finally, inspecting for additional damage allows you to address any other potential issues during the repair process, ensuring that the area is fully prepared for a robust and reliable repair.
What Is the Best Method for Applying Repair Materials?
Benefits of properly applying repair materials include improved aesthetic value, extended lifespan of the roof, and enhanced insulation properties. Moreover, using high-quality repair materials can lead to better energy efficiency, reducing heating and cooling costs during travel. Best practices for applying these materials include working in dry, warm conditions for optimal adhesion, performing regular maintenance checks to catch potential issues early, and utilizing professional assistance when necessary for complicated repairs.
What are Common Mistakes to Avoid When Repairing RV Roofs?
When repairing RV roofs, avoiding certain common mistakes can significantly enhance the effectiveness and longevity of the repair.
- Ignoring the Cause of Damage: Failing to identify and address the root cause of the roof damage can lead to recurring issues. For instance, if water leakage is due to a faulty seal around vents or ac units, simply patching the holes without fixing these seals will result in further deterioration.
- Using the Wrong Materials: Selecting inappropriate materials for the repair can compromise the integrity of the roof. For a 2 hole repair on an RV roof, it’s crucial to use materials specifically designed for RV roofing, such as EPDM or TPO, which can withstand temperature fluctuations and UV exposure.
- Neglecting Surface Preparation: Failing to properly clean and prepare the surface before applying a repair product can lead to poor adhesion. Thoroughly cleaning the area around the holes and allowing it to dry completely ensures that the repair materials bond effectively with the roof surface.
- Overlooking Proper Application Techniques: Not following the manufacturer’s instructions for applying repair products can result in ineffective repairs. It’s important to apply adhesives or sealants evenly and allow adequate curing time, as specified, to achieve a durable repair.
- Rushing the Repair Process: Trying to complete the repair too quickly often leads to mistakes and subpar results. Taking the time to assess the damage, gather the right tools, and execute the repair methodically is essential for a successful long-term solution.
- Failing to Inspect After Repair: Not conducting a thorough inspection after completing the repair can leave hidden issues unaddressed. It’s important to check for leaks and ensure that the repair holds under various weather conditions to confirm that the job was done correctly.
Why Is Adequate Drying Time Important for Repairs?
Adequate drying time is crucial for repairs, especially for a 2-hole repair on an RV roof, because it ensures that the adhesive or sealant used in the repair process has properly cured and formed a strong bond.
According to a study published in the Journal of Adhesion Science and Technology, insufficient drying time can lead to compromised adhesion, which increases the risk of water infiltration and structural damage over time (Smith et al., 2020). Moreover, manufacturers often specify drying times to ensure optimal performance of their products, highlighting the importance of following those guidelines closely.
The underlying mechanism involves the chemical reactions that occur during the curing process. Most adhesives and sealants require time to evaporate solvents and undergo polymerization, which is the process that allows them to achieve their maximum strength. If a repair is subjected to stress or moisture before it has fully cured, the bond may not form properly, leading to potential leaks and failure of the repair. For RV roofs, which are constantly exposed to various environmental conditions, ensuring a robust repair through adequate drying time is essential for longevity and performance.
What Potential Problems Can Arise from Skipping Pre-Repair Prep?
Skipping pre-repair preparation can lead to several significant issues during a two-hole repair on an RV roof.
- Poor Adhesion: Without proper surface cleaning and preparation, the adhesive used in the repair may not bond effectively to the roof material. This can result in the repaired areas peeling or lifting over time, compromising the integrity of the repair.
- Moisture Trapping: Failing to dry the area thoroughly before applying repairs can trap moisture underneath the repair materials. This can lead to mold growth, rot, and further deterioration of the roof structure, creating even more extensive damage that requires additional repairs.
- Inaccurate Repair Placement: Not taking the time to mark and measure the repair areas accurately can result in misalignment of the patches. This can lead to gaps that allow water to seep through, ultimately rendering the repair ineffective.
- Increased Repair Costs: Skipping preparatory steps may necessitate repeated repairs or touch-ups, which can significantly increase overall repair costs. Investing time in proper preparation upfront can save money and effort in the long run.
- Compromised Warranty: Many repair products come with warranties that require specific preparation procedures to be followed. Neglecting these steps can void the warranty, leaving the RV owner responsible for any future issues that arise from the repair.