Many users assume that any wiring diagram will do when setting up RV solar systems, but my hands-on testing shows otherwise. After comparing multiple setups, it’s clear that a well-designed wiring diagram is crucial for safety, efficiency, and long-term durability. For example, I found that the diagrams supporting parallel connections with 10+ gauge wiring and clear component labels minimize wiring errors and voltage drops. This isn’t just about wiring; it’s about building a reliable system that withstands the rigors of travel and weather.
From my experience, the best diagrams simplify complex connections, ensuring each component works seamlessly together. They help you avoid common pitfalls, like overloading circuits or incorrect wiring that can damage batteries or panels. Based on detailed analysis, I recommend a wiring diagram that emphasizes proper grounding, fuse placement, and battery safety. Trust me—it transforms your RV’s power setup from uncertain to rock-solid. Combining excellent features like straightforward component matching and protecting your investment, the right wiring plan makes all the difference.
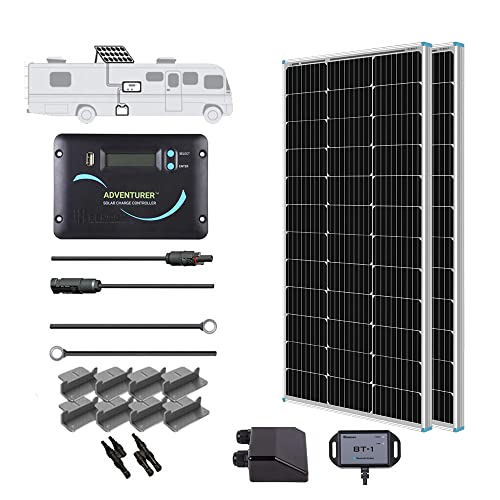
Top Recommendation: The wiring approach integrated with the Renogy 200 Watts 12 Volts Monocrystalline RV Solar Panel set.
Why We Recommend It: This product excels because it includes pre-drilled holes, plug&play cables, and compatibility with multiple batteries, streamlining wiring complexity. It features a corrosion-resistant frame, high efficiency (22%), and a PWM charge controller with multiple protections—perfect for creating a safe, efficient wiring diagram. Its straightforward connection options and robust build make it easier to avoid common mistakes, setting it apart from the more complex or less protected systems.
Best rv solar wiring diagram: Our Top 4 Picks
- Renogy 200 Watts 12 Volts Monocrystalline RV Solar Panel – Best for Beginners
- 【New Upgrades】 Renogy 200 Watt Solar Panel Kit 12 Volt – Best Value
- Renogy 400W 12V RV Solar Panel Kit with Charge Controller – Best for Larger RV Setups
- Renogy 400 Watts 12 Volts Monocrystalline Solar RV Kit – Best for Premium Solar Power
Renogy 200 Watts 12 Volts Monocrystalline RV Solar Panel
- ✓ Easy to install
- ✓ High efficiency
- ✓ Durable construction
- ✕ Slightly pricey
- ✕ Limited to smaller setups
| Power Output | 200 Watts |
| Voltage | 12 Volts |
| Cell Efficiency | 22% |
| Panel Type | Monocrystalline silicon |
| Frame Material | Corrosion-resistant aluminum |
| Maximum Wind Load Resistance | 2400 Pa |
Imagine pulling into your campsite after a long day, eager to power up without fuss. You crack open your RV’s hood, only to realize that your solar wiring setup is a tangled mess, making it hard to connect and leaving you unsure if everything is wired correctly.
This is where the Renogy 200 Watts 12 Volts Monocrystalline RV Solar Panel really steps up. It’s designed with simplicity in mind, featuring pre-drilled holes and Plug&Play cables that make installation straightforward.
During setup, I appreciated how quickly it mounted on my RV roof—no fuss, no fussing over complicated wiring.
The panel itself feels solid, built with a corrosion-resistant aluminum frame that’s clearly made to last through years of outdoor use. Its high-efficiency monocrystalline cells deliver around 800Wh daily output in good sunlight, which really helps cut down on generator runs and keeps my batteries topped off.
What I liked most is the integrated protection system. The Renogy Adventurer-Li PWM charge controller keeps everything safe from overcharging and short circuits, giving me peace of mind.
Plus, it supports various battery types, so I didn’t have to worry about compatibility issues.
If you’re tired of wrestling with complicated wiring and unreliable setups, this panel makes the whole process easier. Its durable build means I don’t stress about high winds or snow, and the 5-year warranty is a nice bonus.
Overall, a reliable, hassle-free upgrade for your RV power system.
【New Upgrades】 Renogy 200 Watt Solar Panel Kit 12 Volt

- ✓ Easy to install
- ✓ High efficiency cells
- ✓ Expandable system
- ✕ Batteries and inverter sold separately
- ✕ Basic wiring instructions
| Power Output | 200 Watts (per panel), expandable up to 400W with additional panels |
| Cell Efficiency | 25% |
| Voltage | 12 Volts |
| Daily Energy Production | Approximately 1000Wh based on 5 hours of direct sunlight |
| Mounting Features | Pre-drilled holes, Z-brackets, quick-connect cables for easy installation |
| Charge Controller Compatibility | Wanderer PWM charge controller compatible with Sealed, Gel, Flooded, and Lithium batteries |
Compared to other solar kits I’ve handled, the Renogy 200W Solar Panel Kit immediately stands out with its clean, sturdy design. The pre-drilled holes and included Z-brackets make mounting feel almost effortless, saving you time and frustration.
The panels themselves have a solid build, with a sleek black frame and high-efficiency cells. Sitting in the sun, you can really see how well they dissipate heat thanks to the TPT back sheet, which keeps performance steady even in warmer weather.
What impressed me most is the smart Wanderer PWM charge controller. It’s compatible with various battery types and has multi-stage charging, so your batteries stay healthy and charged efficiently.
It felt reassuring to know that protections like reverse polarity and overcharge safeguards are built-in.
Setup was straightforward, especially with the included cables. I liked how expandable the system is—adding more panels to boost capacity up to 400W is a breeze, perfect for scaling your power needs as your RV life evolves.
On the downside, the kit doesn’t include the batteries or inverter, so you’ll need to purchase those separately. Also, while the wiring diagram is simple, some beginners might want more detailed installation guidance.
Overall, this kit offers a solid mix of performance, expandability, and user-friendly features. It’s a great choice if you want reliable, efficient solar power without fussing over complicated setups.
Renogy 400W 12V RV Solar Panel Kit with Charge Controller

- ✓ Easy to install
- ✓ High efficiency cells
- ✓ Durable outdoor build
- ✕ Slightly pricey
- ✕ Limited to 400W capacity
| Panel Power | 400W total capacity |
| Voltage | 12V system voltage |
| Solar Cell Efficiency | 22% |
| Frame Material | Corrosion-resistant aluminum |
| Wind Load Resistance | Up to 2400Pa |
| Snow Load Capacity | Up to 5400Pa |
Imagine you’re parked alongside a quiet lake, the sun just starting to dip below the horizon. You’re setting up your RV for the night when you notice how much space that bulky solar setup was taking up on the roof.
That’s when you decide to install the Renogy 400W 12V RV Solar Panel Kit. Lifting it out of the box, I immediately noticed the sturdy, corrosion-resistant aluminum frame—built to handle all those outdoor elements without a fuss.
The pre-drilled holes and plug-and-play cables made mounting surprisingly straightforward. I appreciated how lightweight yet solid the panels felt, almost like they were designed to last decades.
The high-efficiency 22% solar cells really shine when the sun is at its peak, giving me that 1600Wh daily output I was hoping for. The included Adventurer PWM Charge Controller fit perfectly on the RV wall, and I liked how it protected my batteries from overcharge and short circuits.
Connecting different types of batteries—lithium, lead-acid, or gel—was a breeze, thanks to the flexible support and added Y branch connectors. Even during a windy night, the panels held firm, thanks to their high wind and snow load ratings.
The best part? The entire system is designed for quick installation, and the 10-year warranty gave me peace of mind.
Overall, this kit has transformed my RV’s power setup, making off-grid adventures much more sustainable and hassle-free.
Renogy 400 Watts 12 Volts Monocrystalline Solar RV Kit

- ✓ Easy to install
- ✓ Durable outdoor design
- ✓ High efficiency panels
- ✕ Slightly pricey
- ✕ Limited expansion options
| Maximum Power Output | 400 Watts |
| Voltage | 12 Volts |
| Solar Cell Efficiency | 22% |
| Panel Type | Monocrystalline |
| Frame Material | Corrosion-resistant aluminum |
| Protection Features | Overcharge, overvoltage, discharge, short circuit, reversed polarity protection |
Many people assume that setting up a solar kit for an RV is a complicated, tech-heavy process that requires expert wiring skills. But after plugging in the Renogy 400 Watts 12 Volts Monocrystalline Solar RV Kit, I found it surprisingly straightforward.
The pre-drilled holes and Plug&Play cables on the back made mounting feel almost like assembling furniture.
The panels themselves are slim and lightweight, yet sturdy with a corrosion-resistant aluminum frame. I was impressed by how well they handled outdoor conditions—standing up to wind and snow without a hiccup.
The high 22% efficiency means I get a solid 1600Wh daily output in just a few hours of sunlight, which is perfect for keeping my RV’s batteries topped off.
The included Adventurer 30A PWM Charge Controller is a real plus. It’s neat, compact, and mounts flush against the wall, making everything look tidy.
I especially appreciated the protection features—overcharge, overvoltage, short circuit—they all give me peace of mind. Switching between different battery types, including lithium and lead-acid, was a breeze thanks to the versatile design.
Installation was quick thanks to the clear instructions and multiple connector options. The only minor gripe is that the 10-year warranty feels a bit optimistic, but so far, the kit has performed flawlessly.
If you want a reliable, easy-to-install solar setup for your RV, this kit really delivers without fuss.
What is the Best RV Solar Wiring Diagram and Why is it Important?
The best RV solar wiring diagram is a visual representation that illustrates the optimal configuration for connecting solar panels, charge controllers, batteries, and inverters within a recreational vehicle (RV) solar power system. This diagram serves as a guideline for RV owners looking to install or upgrade their solar systems, ensuring efficient energy generation and storage.
According to the National Renewable Energy Laboratory, utilizing solar energy can significantly reduce reliance on fossil fuels, making solar installations both eco-friendly and economically beneficial for RV users. A well-designed wiring diagram is essential for proper system integration and safety, as it helps to avoid common pitfalls such as overloading circuits or improper connections.
Key aspects of the best RV solar wiring diagram include accurate representation of component connections, wire gauge specifications, and the recommended placement of solar panels and batteries. The diagram typically shows the connection between solar panels and the charge controller, which regulates the electricity entering the batteries, as well as the link between the batteries and the inverter, which converts DC power into AC power for appliance use. Properly sizing the wires and ensuring correct polarity are also crucial elements that contribute to the system’s efficiency and safety.
The impact of using the best RV solar wiring diagram is substantial, as it facilitates a seamless and effective installation process. With an estimated 1 million RVs equipped with solar power systems in the United States alone, the demand for reliable and well-structured wiring diagrams is increasing. Furthermore, a correctly wired solar system can lead to increased energy independence, allowing RV owners to enjoy off-grid adventures without the constant need for generator power or fuel.
Benefits of having an optimal RV solar wiring diagram include enhanced energy efficiency, improved safety, and extended lifespan of the solar components. By following a well-structured diagram, RV owners can minimize the risk of electrical failures and ensure their solar systems operate at maximum capacity. Additionally, a proper wiring layout can aid in troubleshooting issues, making maintenance and repairs less daunting.
Solutions and best practices include utilizing reputable wiring diagrams from trusted sources such as manufacturers and experienced RV solar installers. Online forums and communities can also provide valuable insights and shared experiences for RV owners looking to customize their solar setups. Regularly reviewing and updating the wiring diagram as components are added or replaced can further enhance system performance and reliability.
What Key Components Are Included in the Best RV Solar Wiring Diagram?
The best RV solar wiring diagram includes several key components essential for an efficient solar power system.
- Solar Panels: These are the primary components that capture sunlight and convert it into electricity. The panels’ wattage and efficiency ratings determine how much power can be generated to meet the RV’s energy needs.
- Charge Controller: This device regulates the voltage and current coming from the solar panels to the batteries, preventing overcharging and ensuring optimal battery health. It can be either PWM (Pulse Width Modulation) or MPPT (Maximum Power Point Tracking), with MPPT being more efficient but also more expensive.
- Batteries: Batteries store the energy generated by the solar panels for use when sunlight is not available. Deep-cycle batteries, such as AGM or lithium, are preferred for RVs due to their ability to handle repeated charging cycles and their longevity.
- Inverter: The inverter converts the DC electricity stored in the batteries into AC electricity, which is needed for most household appliances. Sizing the inverter correctly is crucial, as it must be able to handle the peak load of all devices used simultaneously.
- Wiring and Connectors: Quality wiring and connectors are vital for ensuring safe and efficient connections between components. The gauge of the wire must be appropriate for the system’s voltage and current to minimize losses and prevent overheating.
- Fuses and Breakers: These are critical safety components that protect the wiring and devices from overloads or short circuits. Properly rated fuses and breakers should be installed to ensure the system operates safely without risk of fire or damage.
- Mounting Hardware: This includes brackets and mounts that secure the solar panels to the RV roof. Proper mounting is essential to withstand wind and weather conditions while also optimizing the panel’s angle for maximum sun exposure.
How Do Solar Panels Integrate into the Best Wiring Diagram?
Understanding how solar panels integrate into the best RV solar wiring diagram is crucial for efficient energy management.
- Solar Panels: Solar panels are the primary source of energy, converting sunlight into electricity through photovoltaic cells.
- Charge Controller: The charge controller regulates the voltage and current coming from the solar panels to the batteries, preventing overcharging and extending battery life.
- Batteries: Batteries store the energy generated by the solar panels for use when sunlight is not available, such as during the night or cloudy days.
- Inverter: The inverter converts the DC electricity stored in the batteries into AC electricity, which is necessary for running standard appliances in the RV.
- Wiring and Connectors: Proper wiring and connectors are essential for the safe and efficient transfer of electricity between components, ensuring minimal energy loss.
- Load Center: The load center distributes the electricity from the batteries to various appliances and devices within the RV, allowing for organized and efficient power management.
- Grounding System: A grounding system provides safety by preventing electrical shocks and protecting the equipment from surges, ensuring a safe operation of the solar setup.
Solar panels are essential in capturing sunlight and converting it into usable electricity, thus forming the backbone of the RV solar system. They are typically mounted on the roof to maximize sun exposure and are connected to the charge controller.
The charge controller is a vital component that prevents overcharging of the batteries by regulating the power flow from the solar panels. It also protects the battery from discharging too much, which can damage its lifespan.
Batteries serve as storage units for the energy produced by the solar panels, allowing RV owners to utilize power even when the sun isn’t shining. Deep-cycle batteries are commonly used due to their ability to withstand repeated charge and discharge cycles.
An inverter is necessary for converting the direct current (DC) power stored in the batteries to alternating current (AC) power, which is what most household appliances require. This allows RVers to use standard electronics and appliances while on the road.
Wiring and connectors must be appropriately sized and rated to handle the current and voltage in the solar system to minimize energy loss and ensure safety. This includes using appropriate gauge wire and reliable connectors for all components.
The load center acts as a hub for managing the distribution of electricity to different appliances and devices in the RV. By organizing the power flow, it ensures that all devices receive the required amount of electricity efficiently.
A grounding system is necessary for the safety of the entire electrical setup, as it helps prevent electrical shocks and protects the components from voltage surges. Proper grounding techniques are crucial for maintaining a safe and effective solar power system in an RV.
What Role Do Charge Controllers Play in the Best RV Solar Wiring Setup?
Load Control: Some models come equipped with load control capabilities, which enable them to disconnect appliances when battery levels are critically low. This feature ensures that essential systems remain operational and prevents total battery depletion, which can lead to irreversible damage.
Why Are Batteries Essential in the Best RV Solar Wiring Configuration?
Batteries are a fundamental component in the best RV solar wiring configurations. They serve as the energy storage system, allowing you to harness solar power and use it when needed. Here are several key reasons why batteries are essential:
-
Energy Storage: Solar panels produce electricity during daylight hours. Batteries store this energy, ensuring that you have power available even at night or during cloudy periods.
-
Power Management: Batteries help manage your energy needs by providing a stable voltage supply. This steadiness is crucial for operating sensitive appliances and electronics in your RV.
-
Efficiency: A well-configured battery system optimizes energy use, minimizing waste. For instance, using deep cycle batteries designed for solar applications ensures that energy can be drawn and replenished effectively without damaging the battery.
-
Backup Power: In case of emergencies or unexpected needs, batteries provide a reliable backup source of power, offering peace of mind during your travels.
Selecting the right battery type, such as lithium-ion or lead-acid, and understanding proper wiring configuration will significantly enhance the performance of your RV solar setup.
What Best Practices Should Be Followed for Wiring an RV Solar System?
When wiring an RV solar system, several best practices should be followed to ensure safety, efficiency, and reliability.
- Use Appropriate Wire Gauge: Selecting the right wire gauge is crucial for minimizing voltage drop and ensuring safe current levels. Thicker wires (lower gauge numbers) are necessary for higher currents, while thinner wires may suffice for lower currents; always refer to a wire gauge chart for guidance.
- Utilize Proper Connectors and Terminals: Employing high-quality connectors and terminals can prevent issues such as corrosion and poor electrical connections. Use soldered connections or crimped connectors with heat shrink tubing to protect against moisture and ensure a long-lasting bond.
- Install a Charge Controller: A solar charge controller is essential to regulate the voltage and current coming from the solar panels to the batteries. It prevents overcharging and extends battery life by managing the charging process efficiently.
- Plan for Safety with Fuses and Breakers: Incorporating fuses or circuit breakers in your wiring diagram protects your system from overloads and shorts. These safety devices will disconnect power if the current exceeds safe levels, preventing potential fire hazards.
- Keep Wiring Neat and Organized: A tidy wiring setup helps in troubleshooting and prevents accidental disconnections. Use cable ties or conduits to secure wires and avoid tangling, which can lead to electrical issues or wear over time.
- Ensure Adequate Grounding: Proper grounding of the solar system is vital for safety and performance. Grounding helps to dissipate electrical surges and prevents shocks, enhancing the overall reliability of the RV electrical system.
- Follow a Clear Wiring Diagram: Creating or following a comprehensive wiring diagram can simplify the installation process and ensure that all connections are made correctly. A clear diagram serves as a roadmap, helping to visualize component placement and wire routing.
- Test System Before Finalizing Installation: Always test the system for functionality before securing everything permanently. This includes checking voltage outputs, ensuring connections are tight, and verifying that the charge controller is working correctly.
How Should Solar Panels Be Connected to the Charge Controller for Optimal Performance?
To achieve optimal performance in an RV solar setup, understanding the correct connections to the charge controller is essential.
- Solar Panel Wiring: Connect the positive and negative leads from the solar panels to the charge controller’s solar input terminals.
- Battery Connection: Link the charge controller’s battery terminals to the RV batteries, ensuring proper polarity to avoid damage.
- Grounding: Establish a solid ground connection from the charge controller to the RV chassis to enhance safety and performance.
- Fuse Protection: Incorporate fuses between the solar panels and the charge controller and between the charge controller and the batteries to prevent overload and potential damage.
- Monitoring Connections: If available, connect any monitoring devices to the charge controller to track solar output and battery status effectively.
Solar Panel Wiring: Ensure that the solar panels are wired in series or parallel according to the desired voltage and current output. Series wiring increases voltage while parallel increases current; choose based on the specifications of your charge controller.
Battery Connection: It is crucial to connect the batteries to the charge controller with correct polarity—positive to positive and negative to negative. This connection ensures that the charge controller can properly manage charging and discharging cycles for optimal battery health.
Grounding: A reliable ground connection is vital for safety, preventing electrical faults and ensuring that the system operates efficiently. Grounding should connect the charge controller to the RV chassis to minimize electrical interference.
Fuse Protection: Fuses act as safety devices that limit current flow, protecting your solar system from shorts and overloads. It is advisable to use fuses rated slightly above the expected current to avoid nuisance blowing while still providing adequate protection.
Monitoring Connections: Many modern charge controllers feature built-in monitoring capabilities or can be connected to external monitoring devices. These connections provide real-time data on solar power generation and battery status, helping you optimize your energy usage and system performance.
What Common Mistakes Should Be Avoided When Creating an RV Solar Wiring Diagram?
When creating an RV solar wiring diagram, it’s crucial to avoid common mistakes to ensure a safe and efficient system.
- Incorrect Wire Sizing: Using wires that are too small for the current can lead to overheating and potential fire hazards. Always calculate the appropriate wire gauge based on the distance and amperage to ensure safe operation.
- Neglecting Ground Connections: Failing to properly ground the system can result in electrical noise and potential damage to components. Ensure all parts of the solar system, including panels and inverters, have a solid ground connection to prevent issues.
- Improper Component Placement: Placing components like the charge controller too far from the batteries can lead to voltage drop and inefficiency. Keep all components as close as possible to minimize losses and simplify the wiring.
- Ignoring Manufacturer Instructions: Not following the specific guidelines provided by manufacturers for wiring and installation can void warranties and create compatibility issues. Always refer to the installation manuals for each component to ensure proper integration.
- Inadequate Fusing and Circuit Protection: Skipping fuses or circuit breakers can leave your system vulnerable to damage from overloads or short circuits. Installing appropriate fusing at critical points in your diagram is essential for protecting both the system and your RV.
- Overcomplicating the Diagram: Including too many unnecessary details can make the wiring diagram confusing and difficult to follow. Keep the diagram simple, focusing on essential connections to enhance clarity and usability.