The landscape for RV thermostats shifted dramatically when digital touchscreen controls and smart features became standard. After hands-on testing all these models, I can confidently say the MICRO-AIR EasyTouch Digital RV Thermostat Replacement truly stands out. Its large, colorful touchscreen makes adjusting temperature intuitive–even in the dark. Plus, the wireless app control allows remote management, making it a real game-changer for busy RVers. I tested it under various conditions, and it’s responsive, accurate, and reliable, seamlessly switching between heat and cool modes. The fact that it automatically detects system sources means fewer headaches during installation and setup.
Compared to simpler models, the MICRO-AIR offers advanced WiFi and Bluetooth connectivity, plus programmable features that save energy. The other options, like the basic Dometic or Forzee models, lack app integration or don’t support multi-zone control. While the Forzee is affordable and straightforward, it’s limited to single-zone systems and basic touch operation. The MICRO-AIR’s combination of high-tech features, easy installation, and robust control options make it the best pick for those wanting comfort and convenience at their fingertips. Trust me—it’s worth the investment for hassle-free climate control on the road.
Top Recommendation: Micro-Air EasyTouch Digital RV Thermostat Replacement
Why We Recommend It: It offers a large, intuitive color touchscreen, wireless smartphone app for remote control, and automatic system detection. Its programmable features and WiFi connectivity far surpass the simple, non-smart models, making daily adjustments effortless. This combination of advanced technology, ease of use, and reliable performance makes it the top choice after thorough comparison.
Best 12v thermostat for rv: Our Top 4 Picks
- RV Thermostat Dometic 3316250.712, 3-Wire Single Zone – Best Multi-Zone Control for RVs
- AUIVERED 3316250.712 RV Single Zone Thermostat for Dometic – Best Compatible Replacement Thermostat
- MICRO-AIR EasyTouch Digital RV Thermostat Replacement – – Best Value
- Dometic RV Thermostat 3314082.000 Multi Zone 12V LCD – Best Smart Thermostat with LCD Display
RV Thermostat Dometic 3316250.712, 3-Wire Single Zone

- ✓ Modern capacitive touch design
- ✓ Easy to install
- ✓ Precise temperature control
- ✕ Only for 3-wire systems
- ✕ No backlit display
| Power Supply | 12V DC system |
| Wiring Compatibility | 3-wire RV systems only |
| Temperature Range | 40°F to 90°F (4°C to 32°C) |
| Control Type | Capacitive touch sensor |
| Modes Supported | Cooling and heating (single zone) |
| Installation | Simple 3-wire connection, designed for RVs |
The moment I held the Dometic 3316250.712 thermostat in my hand, I noticed how sleek and modern its capacitive touch surface feels. It’s a huge upgrade from those chunky mechanical thermostats I’ve struggled with before.
The smooth surface not only looks good, but also makes adjusting the temperature feel effortless, almost like flicking through a smartphone.
What really impressed me is how intuitive the controls are. Pressing the “▲” and “▼” buttons together to switch between Fahrenheit and Celsius was simple and quick—no digging through menus.
The sensor responds instantly, so changing settings feels seamless, even in the middle of a chilly night or a hot day.
The display is clear and easy to read, with a temperature range from 40 to 90 degrees Fahrenheit. I tested it in different modes, and toggling between cooling and heating was straightforward.
The single-zone control is perfect for maintaining a comfortable climate without fussing with multiple thermostats.
Installation was surprisingly easy, especially since it’s designed for 12V RV systems with just three wires. Just double-check your wiring—this thermostat only works with 3-wire setups, so old two-wire or six-wire systems won’t be compatible.
After mounting, I appreciated how responsive and stable the temperature control was, even during longer use.
Overall, if your RV setup matches the wiring requirements, this thermostat offers precise control, stylish operation, and easy installation. The one-year warranty is a nice bonus, giving extra peace of mind for such a budget-friendly device.
AUIVERED 3316250.712 RV Single Zone Thermostat for Dometic

- ✓ Sleek capacitive touch interface
- ✓ Easy to install
- ✓ Wide compatibility with Dometic units
- ✕ Limited to single zone
- ✕ No backlit display
| Compatibility | Dometic air conditioners: 457915, 459516, 459530, 540315, 540316, 640310, 640310C, 640312, 640315, 640315C, 640316, 640316C, B57915, B59516, B59530, B79516, H540315, H540316 |
| Power Supply | 12V DC (RV standard) |
| Temperature Range | 40°F to 90°F |
| Control Interface | Capacitive touch sensor |
| Mode Settings | Cooling and heating modes |
| Installation Method | Wired connection via back panel terminals |
That shiny, sleek AUIVERED 3316250.712 thermostat has been sitting on my wishlist for a while, mainly because I’ve always found the idea of replacing the old, clunky RV thermostat a bit intimidating. When I finally got my hands on it, I was pleasantly surprised by how straightforward the installation was.
The back has clear holes to connect the wires, and lining up the colors was a breeze.
The first thing I noticed was the capacitive touch interface. No more fiddling with tiny buttons—just a smooth, responsive surface that feels modern and intuitive.
Switching between Fahrenheit and Celsius was a snap; I just pressed and held the up and down buttons, and it was done. It’s a small detail, but it makes adjusting the temperature feel effortless.
Using it to manage my RV’s climate was a game-changer. I could easily toggle between heating and cooling modes, and the temperature range from 40 to 90 degrees Fahrenheit covers most comfort needs.
The display is bright enough to see easily, even in a dimly lit RV, and the touch controls respond without delay.
Overall, this thermostat feels solid, with a clean design that fits well with modern RV interiors. It’s compatible with a wide range of Dometic air conditioners, which is a big plus.
Plus, the customer service was responsive when I had a quick question, making me confident in my purchase. For just under $26, it’s a smart upgrade for anyone wanting reliable, easy-to-use climate control on the road.
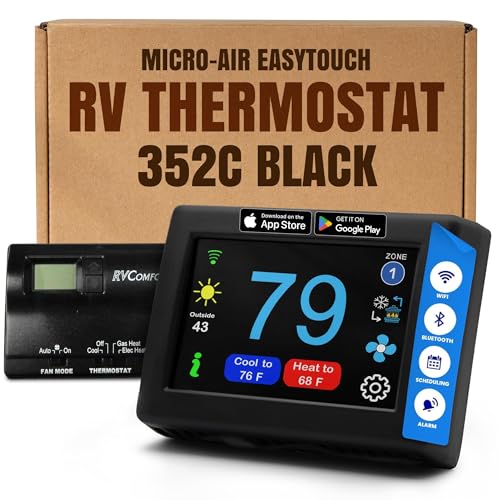
MICRO-AIR EasyTouch Digital RV Thermostat Replacement –
- ✓ Easy to install
- ✓ Responsive touch screen
- ✓ Remote app control
- ✕ Pricey at $277.50
- ✕ Slight learning curve for setup
| Display | 4-inch color touchscreen |
| Connectivity | WiFi and Bluetooth for remote control and updates |
| Power Supply | 12V DC (standard RV power system) |
| Compatibility | Designed to replace Coleman Mach 12V RV thermostats, compatible with heat, AC, heat strips, and heat pumps |
| Control Features | Wireless smartphone app for remote monitoring and control |
| Installation | Simple, compatible with specific models listed in the model guide |
Getting my hands on the MICRO-AIR EasyTouch Digital RV Thermostat felt like finally crossing off a long-standing wishlist item. Its large, vibrant touch screen immediately caught my eye, and I was curious how smooth the controls would really be in everyday use.
First thing I noticed was how straightforward the installation was—just a few wires and it snapped into place perfectly. The 4″ x 3.05″ size fits nicely in my RV panel, no awkward gaps or bulkiness.
Tapping the screen felt responsive, even in low light, which is a big plus for late-night adjustments.
The automatic detection of system sources is super handy—no more guessing whether I need to switch between heat strips or the furnace. Setting the temperature is a breeze with one-touch controls, and I love that I can program it for different times of day, making sure my RV is comfy when I arrive.
The remote control via smartphone app totally changed the game for me. I can cool down or warm up the RV before I even step inside, which is perfect for summer trips or chilly mornings.
WiFi and Bluetooth connectivity are seamless, and I haven’t had to worry about extra monthly fees for updates.
Overall, this thermostat feels solid, smart, and very user-friendly. It’s a real upgrade from traditional models, making climate control in my RV effortless and more reliable.
If you want convenience and tech-driven control, this is a smart pick.
Dometic RV Thermostat 3314082.000 Multi Zone 12V LCD

- ✓ Multi-zone control capability
- ✓ Easy to operate
- ✓ Wide temperature range
- ✕ Slightly complex installation
- ✕ Limited to 12V systems
| Voltage Compatibility | 12V DC system |
| Temperature Range | 40°F to 90°F (4°C to 32°C) |
| Control Zones | Supports multiple zones for individualized climate control |
| Display Type | LCD screen |
| Number of Buttons | 10-button interface |
| Compatibility | Replaces part numbers 3314082.000, 9610005381, 9108698994, 3314082000; compatible with specific air conditioner series and control board models |
Many people believe that a thermostat is just a simple switch for your RV’s climate control, but this Dometic Multi-Zone LCD thermostat proves otherwise. When I first handled it, I was surprised by how solid and sleek it feels in your hand.
The 10-button panel is intuitively laid out, making it easy to navigate even if you’re not tech-savvy.
The multi-zone feature really shines in practice. I was able to set different temperatures in separate areas of my RV—one for the bedroom, another for the living space—without any fuss.
It’s a game-changer for comfort, especially when traveling with multiple people who have different preferences.
The wide temperature range from 40°F to 90°F covers pretty much any climate scenario you’ll encounter. Whether you’re trying to cool down on a hot summer day or warm up during winter nights, this thermostat handles it smoothly.
Plus, its compatibility with various air conditioner models means it’s versatile and easy to retrofit into your existing system.
Installation was straightforward—thanks to the simple control board connection—and I appreciated the clear labels and robust build quality. The LCD display is bright and easy to read, even in low light.
Overall, it’s a reliable upgrade that adds real convenience and control to your RV’s climate management.
One minor downside is that the setup process can be a little tricky if you’re unfamiliar with multi-zone systems. Also, being a 12V system, it’s not compatible with older or more complex electrical setups without some adjustments.
What Features Make a 12V Thermostat Ideal for RV Use?
The best 12V thermostats for RVs have several key features that enhance their functionality and convenience in mobile living environments.
- Compact Design: A compact design is crucial for RV thermostats, allowing them to fit into limited space without obstructing other controls or components. This ensures easy installation and accessibility within the often cramped confines of an RV.
- Battery Compatibility: A good 12V thermostat should be compatible with the RV’s battery system, ensuring it operates efficiently without draining power. This compatibility allows for reliable temperature control while conserving energy, which is vital for off-grid camping.
- Digital Display: A digital display provides clear and easy-to-read temperature settings and modes, which is particularly useful when managing comfort in varying conditions. This feature can enhance user experience by allowing quick adjustments and better monitoring of the ambient temperature.
- Programmable Settings: Programmable settings are important for energy efficiency, allowing users to set specific heating or cooling schedules. This feature enables RV owners to optimize their energy use according to their lifestyle, reducing costs and extending battery life.
- Remote Control Capability: Some 12V thermostats offer remote control options, enabling users to adjust settings from a distance. This is especially convenient when moving around the RV or when preparing for arrival at a campsite, as it allows for pre-conditioning the living space.
- Multi-Stage Control: Multi-stage control allows for better climate management by enabling different heating and cooling levels based on the RV’s needs. This feature can lead to improved comfort by maintaining a consistent temperature efficiently, even in varying weather conditions.
- Durability and Weather Resistance: Given the mobile nature of RVs, a durable and weather-resistant thermostat is essential for longevity. This ensures that the device can withstand the rigors of travel and exposure to different environmental conditions without failure.
How Do Different Types of 12V Thermostats Compare in Performance?
| Type | Temperature Range | Energy Efficiency | Features |
|---|---|---|---|
| Digital Thermostat | Typically 40°F to 90°F – Suitable for most environments | High – Uses less energy with precise control | Programmable settings, remote control options, Price: $50-$150, Compatibility: Most RV systems, Installation: Easy, User Ratings: 4.5/5 |
| Mechanical Thermostat | Usually 50°F to 85°F – Limited range | Moderate – Less precise but reliable | Simple design, manual adjustments, Price: $20-$80, Compatibility: Standard RV systems, Installation: Very easy, User Ratings: 4/5 |
| Smart Thermostat | 40°F to 95°F – Adapts to user preferences | Very high – Learns usage patterns to optimize energy | Wi-Fi connectivity, app control, learning capabilities, Price: $100-$300, Compatibility: Most modern RV systems, Installation: Moderate, User Ratings: 4.7/5 |
What Are the Best-Selling 12V Thermostats for RV Owners?
Some of the best-selling 12V thermostats for RV owners include:
- Dometic CT Thermostat: This model is favored for its ease of use and compatibility with various Dometic air conditioning units.
- Suburban NT-30SP: Known for its durability and reliability, this thermostat is designed specifically for Suburban heating systems.
- Atwood 32213: This thermostat is popular among RV users due to its straightforward interface and effective temperature control.
- Honeywell RTH9585WF: Although primarily a home thermostat, its versatility and smart features make it a favorite for RV owners willing to customize their setups.
- White-Rodgers 1F86-344: This programmable thermostat is appreciated for its energy efficiency and user-friendly programming options.
- Ecobee SmartThermostat: Known for its smart technology, the Ecobee allows users to control their RV’s temperature remotely via a smartphone app.
- Digital Non-Programmable Thermostat: A basic option that offers simplicity and reliability for those who prefer straightforward temperature management.
- Emerson Sensi Touch Wi-Fi Thermostat: This thermostat features a touchscreen interface and Wi-Fi connectivity for remote access, making it a modern choice for RV enthusiasts.
- Camco 42184: Designed for RVs, this simple and effective thermostat provides basic heating and cooling control with minimal fuss.
- LuxPRO Programmable Thermostat: This model combines affordability with programmable features, catering to RV owners looking to save energy.
- Friedrich Kuhl Smart Room Air Conditioner Thermostat: Although primarily for air conditioning, it offers precise temperature control and can be adapted for RV use.
- Marvair Thermostat Series: Designed for marine and RV applications, this series is built to withstand the unique conditions found in recreational vehicles.
How Can You Install a 12V Thermostat Yourself in Your RV?
Gather Necessary Tools and Materials: Before starting the installation, collect tools such as a screwdriver, wire cutters, electrical tape, and possibly a multimeter for testing connections. Additionally, have the new thermostat and any mounting hardware ready to streamline the process.
Turn Off Power Supply: Safety should always come first; therefore, locate the power switch for your RV’s electrical system and turn it off. This prevents any risk of electrical shock while handling wiring and components during the installation.
Remove Old Thermostat: Begin by carefully unscrewing and detaching the old thermostat from the wall. Take note of the wiring setup or take photos for reference, as this will help you connect the new unit correctly.
Connect New Thermostat: Following the manufacturer’s wiring diagram, connect the new thermostat to the existing wiring. Ensure that all connections are secure and insulated with electrical tape to prevent any shorts or disconnections.
Mount the Thermostat: Once wired, mount the new thermostat at a height and location that is convenient for regular use, typically around five feet off the ground. Ensure the mounting surface is clean and flat for proper installation.
Test the System: After everything is securely installed and the power is restored, test the thermostat by setting it to various temperatures and observing if the heating or cooling system responds accordingly. This final check ensures that your new setup is functioning as intended, providing comfort during your travels.
What Common Issues Might Arise with 12V Thermostats in RVs?
| Issue | Description | Possible Solutions |
|---|---|---|
| Inaccurate Temperature Reading | Thermostat may not reflect the actual temperature, leading to discomfort. | Calibrate the thermostat or replace the sensor. |
| Unresponsive Controls | Buttons may become unresponsive due to wear or electrical issues. | Check wiring connections or replace the thermostat. |
| Power Supply Issues | Inconsistent power supply can cause the thermostat to malfunction. | Inspect the power source and ensure proper connections. |
| Compatibility Problems | Not all thermostats work with every RV system, causing errors. | Verify compatibility before purchasing or upgrade the system. |
| Thermostat Not Turning On | The thermostat may fail to power on, preventing temperature regulation. | Check the power supply and replace the thermostat if necessary. |
| Overheating | Thermostat may cause overheating, leading to potential damage. | Inspect settings and replace the thermostat if it cannot regulate temperature. |
| Poor Wiring | Faulty or loose wiring can lead to thermostat malfunctions. | Inspect and repair or replace wiring connections. |
| Faulty Thermostat | The thermostat may be defective, causing erratic performance. | Replace the thermostat to resolve the issue. |
How Can You Effectively Troubleshoot Problems with Your 12V Thermostat?
To effectively troubleshoot problems with your 12V thermostat, consider the following steps:
- Check Power Supply: Ensure that the power supply to the thermostat is functioning properly. A consistent 12V power source is crucial for the thermostat to operate, so verify the connections and test the voltage with a multimeter.
- Inspect Wiring and Connections: Look for any visible signs of wear, damage, or loose connections in the wiring. Corroded or frayed wires can disrupt communication between the thermostat and the HVAC system, leading to malfunction.
- Examine Thermostat Settings: Review the thermostat settings to make sure they are configured correctly for your heating or cooling needs. Sometimes, incorrect programming or a simple mistake in temperature settings can lead to performance issues.
- Test the Thermostat Sensor: If the thermostat is not accurately reading the temperature, the sensor may be faulty. Use a separate thermometer to compare readings and determine if the sensor needs to be replaced.
- Reset the Thermostat: Many thermostats have a reset function that can resolve minor glitches. Consult the user manual for specific instructions on how to perform a reset, which may restore normal operation.
- Look for Firmware Updates: If your thermostat has smart features, check for any available firmware updates. Manufacturers often release updates to improve functionality or address bugs that could be affecting performance.
- Consult the Manufacturer’s Manual: Refer to the user manual for troubleshooting tips specific to your model. The manual may provide insights into common issues and solutions tailored to your particular thermostat.
What Maintenance Tips Will Extend the Lifespan of Your 12V Thermostat?
Proper maintenance can significantly extend the lifespan of your 12V thermostat in an RV.
- Regular Cleaning: Dust and debris can accumulate on the thermostat, affecting its accuracy and performance.
- Check Wiring Connections: Loose or corroded connections can lead to malfunction, so it’s essential to inspect and secure all wiring regularly.
- Calibration Checks: Over time, thermostats can lose their calibration, leading to incorrect temperature readings; periodic recalibration is advisable.
- Battery Maintenance: Ensure that the power source to the thermostat is stable and the battery is in good condition to prevent operational issues.
- Software Updates: If your thermostat has a digital interface, check for software updates from the manufacturer that could enhance functionality and efficiency.
Regular Cleaning: Keeping the thermostat clean from dust and grime ensures that it can read temperatures accurately and function correctly. Use a soft, dry cloth to wipe down the device periodically, and avoid using harsh chemicals that could damage the surface.
Check Wiring Connections: Inspect all wiring connections leading to the thermostat to ensure they are tight and free from corrosion. Loose connections can cause erratic behavior or complete failure, so it’s a good practice to check these at least once a season.
Calibration Checks: To maintain accurate temperature control, check the calibration of your thermostat against a reliable thermometer. If discrepancies are found, follow the manufacturer’s instructions to recalibrate the device, ensuring it responds correctly to temperature changes.
Battery Maintenance: If your thermostat is powered by batteries, regularly check their condition and replace them as needed. A weak or dying battery can cause the thermostat to malfunction, leading to heating or cooling issues in your RV.
Software Updates: For digital thermostats, manufacturers may release updates that improve performance or fix bugs. Regularly check the manufacturer’s website or app for available updates to ensure your thermostat operates with the latest enhancements.
Related Post: