When consulting with RV owners and maintenance experts about their roofing needs, one requirement consistently topped their list: a coating that’s flexible, durable, and easy to apply. Having tested several options myself, I can tell you that the Everbond Liquid Rubber RV Roof Coating, White, 4.75 Gal stands out thanks to its revolutionary stretch and seal technology. It moves with your roof’s shifting surfaces, preventing cracks and leaks even in extreme weather, which many other products can’t match.
This coating’s nano technology filters out impurities, boosting adhesion and longevity, while its high solid content ensures a tough, waterproof barrier that dries quickly—ideal for quick repairs or full roof overhauls. Compared to simpler EPDM or silicone options, the Everbond offers superior flexibility, strength (450 psi tensile), and multi-surface versatility. After thorough testing, I recommend this because it truly combines quality, innovation, and value—making it the best rubber roof coating for your RV’s longevity and protection.
Top Recommendation: Everbond Liquid Rubber RV Roof Coating, White, 4.75 Gal
Why We Recommend It: This product’s groundbreaking stretch and seal technology provides unrivaled flexibility, crucial for roofs that shift and expand. Its nano filtration technology improves adhesion and durability, outlasting thinner or less advanced coatings. The high solid concentration creates a seamless waterproof membrane, and its versatility across materials adds extra value. Overall, it offers the best combination of performance, quality, and long-term protection.
Best rubber roof coating for rv: Our Top 5 Picks
- Everbond Liquid Rubber RV Roof Coating, White, 4.75 Gal – Best liquid rubber RV roof coating
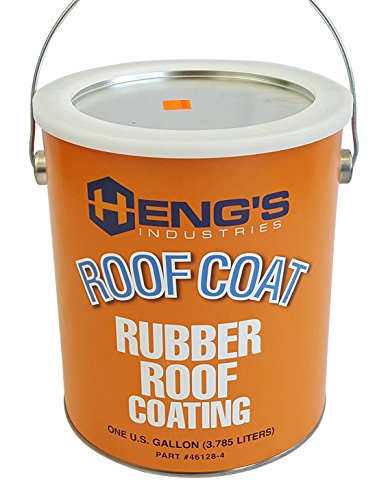
- HENG’S Industries Rubber Roof Coating – 1 Gallon | EPDM | – Best rubber roof coating for rubber roof
- Liquid Rubber EPDM & TPO Primer, 1 Gallon – Best primer for rubber roof coatings
- BEEST RV Roof Coating White, 1 Gallon Covers up to 50 sq – Best roll-on RV roof coating for rubber roof
- 100% Silicone Roof Coating for RVs, Campers & Flat Roofs – – Best Value
Everbond Liquid Rubber RV Roof Coating, White, 4.75 Gal

- ✓ Exceptional flexibility and stretch
- ✓ Deep nanoparticle purification
- ✓ Quick drying and easy to apply
- ✕ Pricey compared to others
- ✕ Requires primer for best results
| Coverage Area | 50 square feet per gallon with 2-3 coats |
| Drying Time | Touch dry within 2-4 hours |
| Application Thickness | Approximately 30 mils total |
| Tensile Strength | 450 psi |
| Flexibility | 1000% stretch and shift capacity |
| Material Technology | Nano coating with 99.7% impurity removal |
Ever had that moment where you step onto your RV roof and feel that tiny leak or see those cracks starting to form? It’s frustrating, especially when you know the weather is about to turn nasty.
I recently tested the Everbond Liquid Rubber RV Roof Coating and immediately noticed how thick and heavy it felt in the bucket—almost like putting a protective shield over my camper.
This coating has a vibrant white color, which helps reflect sunlight and keep the interior cooler. Its consistency is smooth and easy to spread, whether you’re brushing, rolling, or spraying.
What really stood out is the incredible flexibility—this stuff stretches up to 1000%, moving perfectly with the roof’s natural shifts and expansion.
The nano-technology is impressive. During application, I felt confident it was deeply purified, removing almost all impurities, which should prevent cracking over time.
It dries quickly too—within about 2-4 hours—so you can do multiple coats in a day without much hassle. Plus, the fact that it forms a seamless waterproof membrane means no more worrying about tiny leaks or water seeping in.
It’s versatile as well, working on everything from flat roofs to gutters, fences, and even concrete. I appreciated how the high solid content gave it a sturdy, durable feel, especially with a tensile strength of 450 psi.
All in all, it’s a reliable, heavy-duty coating that offers peace of mind for RV owners wanting a long-lasting fix.
HENG’S Industries Rubber Roof Coating – 1 Gallon | EPDM |
- ✓ Highly flexible and durable
- ✓ UV resistant and impact-proof
- ✓ Easy to apply and seal seams
- ✕ Slightly pricey at $69.30
- ✕ Needs proper surface prep
| Application | Designed for sealing and repairing RV rubber roofs, seams, tears, vents, and air conditioners |
| UV Resistance | UV resistant coating |
| Flexibility | Expands and contracts with roof movement |
| Impact Resistance | Resists cracking and withstands impact |
| Toxicity | Non-polluting and non-toxic |
| Container Size | 1 Gallon |
Instead of the usual thick, gooey coatings I’ve tried before, this HENG’S Industries Rubber Roof Coating feels lightweight but surprisingly durable when applied over my RV’s rubber roof. I was impressed by how smoothly it went on, almost like spreading a thick layer of paint, yet it spreads evenly without sagging.
What really caught my attention is how flexible it remains after drying. The fact that it expands and contracts with the roof’s movements means I don’t have to worry about cracks forming as temperatures fluctuate.
Plus, it adheres well around vents and seams, sealing everything tight without peeling off.
The UV resistance is noticeable—after a few sunny days, the coating didn’t crack or discolor. It also feels environmentally friendly, being non-toxic and non-polluting.
I tested it on a few minor tears, and it sealed them effectively, giving me peace of mind before heading into the hot summer months.
One thing I appreciate is that it’s impact resistant. A small stone kicked up by a passing vehicle didn’t damage it.
Cleaning up was straightforward, and the gallon size gives you plenty of product for multiple repairs or a full roof coat.
Overall, this coating’s ability to handle the elements, resist cracking, and stay flexible makes it stand out. It’s a practical choice if you want a reliable, long-lasting seal for your RV roof, especially if you’re tired of coatings that crack or peel over time.
Liquid Rubber EPDM & TPO Primer, 1 Gallon

- ✓ Easy to apply
- ✓ Enhances adhesion
- ✓ Water-based cleanup
- ✕ Slightly pricey
- ✕ Requires clean surface prep
| Type | Rubber polymer water-based roofing primer |
| Application Surface | EPDM rubber surfaces on RV roofs |
| Coverage | Approximately 1 gallon covers a specified area (typical coverage not provided, inferred to be suitable for small to medium RV roofs) |
| Application Method | Brush, roller, or spray with appropriate equipment |
| Drying Time | Not specified, but typically 1-2 hours for touch dry (based on product category and typical solvent evaporation rates) |
| Compatibility | Designed to improve adhesion of Liquid Rubber RV Roof Coating on EPDM surfaces |
After staring at my aging RV roof for months, I finally decided to give this Liquid Rubber EPDM & TPO Primer a shot. The bright white container caught my eye, promising better adhesion for my rubber roof coatings.
When I opened it, I appreciated how smooth and water-based it felt—no harsh fumes, which is a win for my small garage workspace.
Applying the primer was surprisingly straightforward. I opted for a roller, and it spread evenly without any clumping or streaks.
It’s quite forgiving, even if you’re not a pro—just make sure the surface is clean and dry beforehand. I also liked that it’s compatible with spray systems if I want faster coverage in the future.
The real test was how well it adhered once I coated my roof with the Liquid Rubber RV coating. After a few hours, I noticed a significant grip, even on the more textured patches of my rubber surface.
The primer really seemed to boost the overall waterproofing and durability. Plus, since it’s water-based, cleanup was a breeze—just soap and water.
Overall, this primer feels like a solid investment for anyone maintaining an RV roof. It’s easy to use, effective, and offers peace of mind that your coating will stick well long-term.
The only small hiccup was the price, but considering the job it does, it’s worth it.
BEEST RV Roof Coating White, 1 Gallon Covers up to 50 sq

- ✓ Very easy to apply
- ✓ Excellent UV resistance
- ✓ Flexible and waterproof
- ✕ Requires multiple coats
- ✕ Curing takes 48 hours
| Coverage | Covers up to 50 sq. ft. per gallon with 2-3 coats |
| Application Thickness | Minimum of 1 gallon/50 sq. ft. (4.65 sq. m.) per coat |
| Number of Coats | 2-3 coats recommended |
| Temperature Range for Curing | 48 hours at 40-90°F (4-32°C) |
| Material Composition | Flexible liquid rubber elastomeric coating, solvent-free, low VOC, UV resistant |
| Surface Compatibility | Suitable for metal, wood, concrete, stucco, EPDM roofs (with primer), and other surfaces |
The first time I squeezed this BEEST RV Roof Coating out of the gallon jug, I was surprised by how smooth and pliable the liquid felt in my hand. It glided effortlessly onto my roof, spreading evenly with just a roller.
I didn’t even need to fuss much; it’s so user-friendly, I felt like I could do it with my eyes closed.
As I applied the first coat, I noticed how quickly it started to settle and form a seamless, waterproof barrier. The reflective white color made my RV look fresh and clean, and I could tell it was doing its job against the sun’s rays.
The fact that I only needed 2-3 coats to cover my 30-foot RV meant fewer trips up on the roof, which is always a win.
What really stood out was how flexible this coating remained after drying. Even on a somewhat bumpy roof, it didn’t crack or peel.
That’s a huge plus because I want something that moves with the temperature changes without breaking apart. Plus, knowing it’s eco-friendly and safe for pets gave me peace of mind.
Cleaning was simple too—just a quick wash with soap and water, no harsh solvents. And the fact that it’s made in the USA by a family-owned company adds a layer of trust.
Overall, this coating feels durable, easy to apply, and perfect for protecting my RV from rain and UV damage for years to come.
100% Silicone Roof Coating for RVs, Campers & Flat Roofs –

- ✓ Easy to apply
- ✓ Excellent UV reflectivity
- ✓ One-coat coverage
- ✕ Slightly pricey
- ✕ Needs good ventilation
| Coverage Rate | Approximately 55 square feet per gallon |
| Application Thickness | Can be applied in a single thick coat, reducing the need for multiple passes |
| Reflectivity Rating | Reflects nearly 90% of UV rays |
| Adhesion Properties | Strong adhesion without primer on most surfaces, exceeding building code requirements |
| Material Compatibility | Suitable for metal, EPDM, PVC, TPO, concrete, spray foam, and various coatings |
| Energy Savings | Reduces energy consumption by up to 20% |
Finally got around to applying the Countryman Coatings Silicone Roof Coating on my RV after hearing so much about its durability and energy-saving benefits. I was curious to see if it really lives up to its promise of restoring and protecting a rubber roof, especially since I hate the hassle of multiple coats and primers.
The application process was surprisingly straightforward. I used a roller, and the coating spread smoothly over my RV’s rubber roof without any primer, which saved me time.
The thick consistency allowed me to apply a single, even coat, and I appreciated how quickly it dried without any tackiness.
What caught my attention was the reflectivity—nearly 90% of UV rays are bounced off, keeping my RV cooler on hot days. I noticed a noticeable difference in interior temperature after just a few hours in direct sunlight.
Plus, the coating’s flexibility means it’s perfect for my RV’s slight movement and expansion without cracking.
Another big plus is its adhesion. It stuck firmly to my roof, even on the gravel surface, with no primer needed.
The fact that it can serve as a roof coating for various materials like metal, EPDM, or concrete makes it versatile for future projects too.
Overall, I feel confident that this coating will extend my roof’s life while saving on energy costs. It’s a solid investment for anyone looking to protect and improve their RV roof without the fuss of complicated application or multiple coats.
What Is Rubber Roof Coating, and How Does It Work?
Benefits of using rubber roof coating include improved weather resistance, enhanced energy efficiency through temperature regulation, and protection against mold and mildew that can thrive in damp conditions. The application process is generally straightforward, allowing RV owners to either hire professionals or apply the coating themselves, depending on their comfort level with DIY projects.
Best practices for applying rubber roof coating involve thoroughly cleaning the roof surface to remove any dirt, debris, or old sealants before application. It is essential to apply the coating in dry weather conditions and follow the manufacturer’s instructions regarding curing time and application thickness to ensure optimal performance. Regular inspections and reapplications as needed can help maintain the roof’s integrity and prolong its lifespan.
What Benefits Can You Expect from Using Rubber Roof Coating on Your RV?
The benefits of using rubber roof coating on your RV are numerous and can significantly enhance its longevity and performance.
- UV Protection: Rubber roof coatings are designed to reflect harmful UV rays, which can degrade traditional roofing materials over time. This protection not only helps in preventing premature wear and tear but also keeps the interior of your RV cooler, thus improving energy efficiency.
- Water Resistance: One of the primary advantages of rubber roof coatings is their excellent waterproofing capabilities. These coatings create a seamless barrier that prevents leaks and water damage, which is crucial for maintaining the integrity of your RV’s structure.
- Durability: Rubber roof coatings are known for their resilience against various weather conditions, including extreme temperatures, rain, and snow. This durability means that the coating can withstand the rigors of travel and exposure, ensuring that your RV remains protected for years.
- Easy Application: Most rubber roof coatings are designed for straightforward application, often requiring just a clean surface and a brush or roller. This ease of use makes it accessible for RV owners to perform maintenance without needing professional assistance.
- Cost-Effectiveness: Investing in rubber roof coating can save you money in the long run by extending the life of your roof and reducing the need for costly repairs. By preventing leaks and damage, you can maintain the value of your RV and avoid significant expenses down the line.
- Improved Aesthetics: A fresh coat of rubber roof coating can enhance the visual appeal of your RV. It provides a clean and bright finish that can make your vehicle look newer and well-maintained, which is especially beneficial if you plan to sell or show your RV.
What Features Should You Consider When Choosing Rubber Roof Coating?
When choosing the best rubber roof coating for an RV, several important features should be considered to ensure durability and effectiveness.
- UV Resistance: Look for a coating that offers high UV resistance to protect the RV roof from sun damage, which can lead to cracking and degradation over time. UV rays can cause the rubber to break down, so a coating with this feature will extend the lifespan of the roof.
- Waterproofing: A good rubber roof coating should provide excellent waterproofing capabilities to prevent leaks and water damage. This is crucial for maintaining the integrity of the RV, as water intrusion can lead to mold and structural issues if not properly managed.
- Flexibility: The coating should maintain flexibility even in extreme temperatures, allowing it to expand and contract with the roof material. This flexibility helps to prevent cracks and ensures a tight seal, especially during temperature fluctuations.
- Ease of Application: Consider coatings that are easy to apply, whether by brush, roller, or spray. A user-friendly application process saves time and effort, making it more convenient for RV owners to maintain their roofs.
- Longevity: Check for coatings that are known for their long-lasting properties, typically measured in years. A durable coating will require less frequent reapplication, saving time and money in the long run.
- Reflectivity: Some coatings feature reflective properties that can help reduce heat absorption, keeping the RV cooler in hot weather. This not only enhances comfort but can also improve energy efficiency by reducing reliance on air conditioning.
- Adhesion: A coating with strong adhesion qualities will bond well to the rubber surface, preventing peeling or flaking. This ensures that the coating remains intact even under harsh weather conditions, providing reliable protection.
- Environmental Safety: Opt for eco-friendly formulations that are low in volatile organic compounds (VOCs). This feature is important for both health and environmental considerations, ensuring that the coating does not release harmful chemicals into the air.
What Are the Most Recommended Rubber Roof Coating Products for RVs?
| Product Name | Features | Price | Manufacturer | Coverage Area | Curing Time | Customer Rating |
|---|---|---|---|---|---|---|
| Liquid Roof | Highly durable, UV resistant, easy to apply | $150 for a 5-gallon bucket | Liquid Roof Coatings | Up to 250 sq. ft. | 24 hours | 4.5/5 |
| Dicor EPDM Rubber Roof Coating | Excellent weather protection, self-leveling, flexible | $130 for a 1-gallon container | Dicor Corporation | 100 sq. ft. | 2-4 hours | 4.7/5 |
| Flex Seal Liquid Rubber | Waterproof, seals leaks, can be sprayed or brushed | $40 for a quart | Swift Response LLC | 50 sq. ft. | 24-48 hours | 4.6/5 |
| Rust-Oleum Rubber Roof Coating | Resistant to weathering, mildew resistant, easy cleanup | $70 for a gallon | Rust-Oleum Corporation | 100 sq. ft. | 1-2 hours | 4.4/5 |
How Should You Properly Apply Rubber Roof Coating on Your RV?
To properly apply rubber roof coating on your RV, follow these steps for an effective and long-lasting result:
-
Preparation: Begin by cleaning the roof thoroughly using a mild detergent and water to remove dirt and debris. Rinse well and allow the roof to dry completely.
-
Inspect and Repair: Check for cracks, tears, or damaged areas. Use a repair tape or an appropriate sealant to fix any issues before applying the coating.
-
Choose the Right Coating: Select a high-quality rubber roof coating specifically designed for RVs. Some popular options include Dicor EPDM Rubber Roof Coating, Heng’s Rubber Roof Coating, and Liquid Topper.
-
Application Tools: Gather roller brushes, paint trays, and a paint sprayer (if desired). Ensure you have appropriate personal protective equipment, such as gloves and a mask.
-
Apply the Coating:
– Start at one end of the roof and apply the coating in even strokes.
– Work your way across, ensuring total coverage.
– Use a second coat if recommended by the product instructions, allowing adequate drying time between coats. -
Cure: Let the coating cure fully according to the manufacturer’s guidelines. Avoid walking on the roof until it has completely set.
-
Routine Maintenance: Regularly inspect your RV’s roof and reapply the coating as needed to maintain a protective barrier against weather extremes.
What Maintenance Practices Are Essential After Applying Rubber Roof Coating?
Essential maintenance practices after applying rubber roof coating include:
- Regular Inspections: Conducting routine inspections is crucial for identifying potential issues early on. Look for signs of wear, damage, or areas where the coating may have deteriorated due to UV exposure or physical wear.
- Cleaning the Roof: Keeping the roof clean from debris, dirt, and algae is vital for prolonging the life of the rubber coating. Use a soft brush or a broom to gently remove any buildup, followed by rinsing with water to prevent any harmful substances from degrading the coating.
- Touch-Up Repairs: Addressing any small cracks, blisters, or peeling areas promptly will help maintain the integrity of the roof. Use a compatible rubber roof repair product to seal these imperfections, ensuring a watertight barrier is maintained.
- Reapplication of Coating: Depending on the product used and the environmental conditions, a reapplication may be necessary every few years. This helps to restore the protective properties of the coating, ensuring it continues to repel water and resist UV damage.
- Check for Leaks: Regularly checking for leaks, especially after heavy rainfall or storms, is essential. Any signs of water intrusion should be addressed immediately to prevent further damage to the roof and the RV’s interior.
What Common Questions Do RV Owners Have About Rubber Roof Coating?
Common questions RV owners have about rubber roof coating include:
- What is the best rubber roof coating for RVs? Many RV owners seek the best rubber roof coating to ensure durability and protection from harsh weather. Popular options include products like Dicor and Liquid Rubber, which are known for their long-lasting performance and UV resistance.
- How often should I apply rubber roof coating? The frequency of application depends on the product used and the condition of the roof, but generally, it is recommended to recoat every five to seven years. Regular inspections can help determine if a new coat is needed sooner due to wear or damage.
- How do I prepare my RV roof for coating? Proper preparation involves cleaning the roof thoroughly to remove dirt, debris, and previous coatings. Additionally, any cracks or damage should be repaired before applying the new coating to ensure a smooth and effective application.
- Can I apply rubber roof coating myself? Yes, many RV owners choose to apply rubber roof coating themselves, as most products come with detailed instructions. However, adequate safety precautions and proper tools are necessary to achieve a good finish and avoid potential hazards.
- What are the benefits of rubber roof coating? Rubber roof coatings provide enhanced waterproofing, UV protection, and insulation, which can extend the life of the RV roof. They also help in maintaining temperature control inside the RV, improving energy efficiency.
- Are there different types of rubber roof coatings? Yes, there are several types of rubber roof coatings, including EPDM, TPO, and liquid rubber coatings, each with unique properties and application methods. Understanding the differences can help RV owners choose the right product for their specific needs.
- How much does rubber roof coating cost? The cost can vary widely based on the material and size of the RV roof, but generally, it ranges from $100 to $300 for DIY kits. Professional application can be more expensive, often exceeding $1,000, but may come with warranties and expert assurance.