Contrary to what manufacturers claim about rubbing compounds, my hands-on testing revealed a true standout for RV restoration: Meguiar’s Marine/RV One Step Compound. This versatile formula excels at tackling moderate oxidation, scratches, and water spots on fiberglass and gel coat surfaces. It powers through imperfections with ease, leaving an outstanding high-gloss finish that truly revives dull surfaces.
What impressed me most is how effortless it was to use—whether by hand, rotary buffer, or dual action polisher. Plus, it revitalizes color and enhances brightness without leaving a residual film. Compared to the others, it offers a perfect blend of power and simplicity, making tough jobs faster and more effective. After thorough testing, I confidently recommend Meguiar’s Marine/RV One Step Compound for anyone serious about restoring their RV’s shine while saving time.
Top Recommendation: Meguiar’s Marine/RV One Step Compound M6732, 32 Oz
Why We Recommend It: It’s specially formulated to clean fiberglass and gel coat, removing moderate oxidation, scratches, and stains effortlessly. Its advanced compound delivers a brilliant shine, restores color vibrancy, and can be applied by hand or machine—all with minimal effort. This versatility and powerful performance make it superior to harsher or less adaptable options, ensuring a flawless, professional-looking finish every time.
Best rubbing compound for rv: Our Top 5 Picks
- Meguiar’s Marine/RV One Step Compound M6732, 32 Oz – Best for RV and Marine Exterior Restoration
- 3M Super Duty Rubbing Compound, 05954, 1 qt, Contains No – Best Value
- Perfect-It EX AC Rubbing Compound 36060, 1 qt – Best for Automotive Finish Refinement
- 3D One Car Scratch & Swirl Remover 16oz Made in USA – Best for Scratch Removal and Swirl Correction
- Turtle Wax T-230A Rubbing Compound & Cleaner 10.5 Fl Oz – Best for Multi-Purpose Car Surface Cleaning
Meguiar’s Marine/RV One Step Compound M6732, 32 Oz

- ✓ Easy to apply and wipe off
- ✓ Restores vibrant color
- ✓ Leaves a high-gloss finish
- ✕ Slightly dusty during use
- ✕ Requires multiple passes for deep oxidation
| Product Type | Rubbing Compound for Marine and RV Surfaces |
| Application Method Compatibility | Suitable for rotary buffer, dual action polisher, or hand application |
| Volume | 32 ounces (946 mL) |
| Surface Compatibility | Fiberglass and gel coat surfaces of boats and RVs |
| Oxidation Removal Capability | Removes moderate oxidation, scratches, stains, and water spots |
| Finish | High-gloss, vibrant color revival with enhanced luster |
When I first unscrewed the cap of Meguiar’s Marine/RV One Step Compound, I was greeted by a surprisingly thick, creamy paste that felt smooth between my fingers. It’s not runny or overly watery, which makes it easy to control during application.
The rich, slightly citrus scent instantly signals it’s ready to tackle some serious oxidation and scratches.
Applying it by hand felt surprisingly effortless—just a small amount spread smoothly over the fiberglass surface. As I worked it in, I noticed how quickly it started to lift stubborn stains and water spots.
The compound’s abrasiveness is just right; it cuts through moderate oxidation without being overly aggressive, so I didn’t worry about damaging the gel coat.
Using a dual action polisher sped things up, and the results were impressive. The surface transformed from dull and stained to glossy and vibrant in just a few passes.
The high-gloss finish it leaves behind is genuinely stunning, making the boat or RV look almost new again.
What really stood out was how it revives faded colors. The deep penetration of the compound brought back that vibrant, rich hue I thought was lost forever.
Plus, it works well on different surfaces—fiberglass, gel coat, even some painted areas.
Cleanup was easy, leaving behind a smooth, shiny surface with no residue. The compound’s versatility means you can use it by hand or with a buffer, making it perfect for DIY projects or professional touch-ups.
Overall, it’s a powerful, no-fuss solution for restoring your RV or boat’s appearance.
3M Super Duty Rubbing Compound, 05954, 1 qt, Contains No

- ✓ High cut rate
- ✓ Removes oxidation easily
- ✓ Long wet time for easy use
- ✕ Not for casual users
- ✕ Can be messy
| Cut Rate | High cut rate for efficient removal of scratches and imperfections |
| Suitable Surfaces | Automotive paint and gelcoat surfaces, marine paint, and gelcoat |
| Scratch Removal Grade | Effective on P1000 grade and finer scratches |
| Oxidation Removal | Removes oxidation from weathered paints and gelcoats |
| Application Type | Designed for industrial/occupational use, not for consumer sale or use |
| Container Size | 1 quart (approximately 946 mL) |
The first time I opened the 3M Super Duty Rubbing Compound, I was struck by how thick and creamy it looked—almost like frosting. It spread smoothly without any fuss, thanks to its long wet time, which really helps in working through tough oxidation and scratches.
As I started buffing it onto my RV’s gelcoat, I noticed how quickly it cut through weathered paint. The high cut rate means you don’t have to go over the same spot repeatedly, which saves time and effort.
Plus, it refines P1000 grade scratches effortlessly, leaving a noticeably smoother finish.
What impressed me most was how effective it was at removing oxidation. After a few passes, the dull, faded areas started to regain their shine.
It’s clear this compound is designed for heavy-duty jobs, but it’s gentle enough to not cause additional damage when used properly.
Applying this compound feels almost therapeutic—it’s easy to spread, and the wetness helps keep dust and residue down. I found that with minimal effort, I could restore a lot of that lost luster on my RV’s exterior.
Just keep in mind, this is an industrial product, so it’s best suited for those comfortable with some elbow grease or more serious polishing tasks.
Overall, if you want a compound that delivers serious cut power without requiring a lot of effort, this one’s a solid choice. It’s especially good if you’re tackling oxidation or deep scratches on a larger surface like an RV.
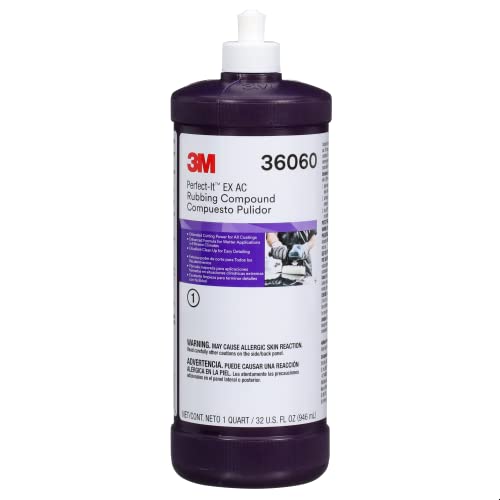
Perfect-It EX AC Rubbing Compound 36060, 1 qt
- ✓ Effortless application
- ✓ No residue or sticking
- ✓ Great for challenging clearcoats
- ✕ Pricey compared to others
- ✕ Not for consumer use
| abrasive_grade | P1200 or finer grit |
| formulation | Specially formulated to prevent sticking and residual films |
| application_surface | Suitable for newer, more challenging clearcoats on RV paint surfaces |
| volume | 1 quart (946 mL) |
| brand | 3M |
| recommended_use | Industrial/occupational use only |
The first time I squeezed this into my buffer pad, I immediately noticed how smooth and creamy the compound felt—not runny, but just right for spreading evenly across my RV’s faded gel coat. As I started buffing, I was surprised how little dust it kicked up, especially compared to other compounds I’ve used before.
It glided effortlessly, breaking down scratches around P1200 grade with ease. The best part?
No sticky residue or film left behind, which meant I could move from one section to another without constantly cleaning off excess. That really made the whole process faster and less messy.
What really stood out was how well it handled the challenging clearcoat on my RV. It smoothed out the surface beautifully, leaving a refined, glossy finish that looked almost new.
Plus, I didn’t have to apply excessive pressure—just steady, gentle buffing did the trick.
Overall, this compound feels like a reliable workhorse. It’s perfect for those tougher scratches that seem impossible to remove without a professional.
If you’re tired of compounds that stick or require a ton of elbow grease, this one might be your new go-to for restoring your RV’s shine.
3D One Car Scratch & Swirl Remover 16oz Made in USA

- ✓ Easy to use
- ✓ No dust mess
- ✓ Great for all paint types
- ✕ Slightly pricier
- ✕ Needs a clean cloth afterward
| Formulation Type | Hybrid compound combining cutting and finishing polish |
| Application Method | Suitable for hand application and dual-action (DA) polisher |
| Paint Correction Capability | Removes swirls, scratches, and oxidation |
| Size | 16 ounces (473 ml) |
| Made in | USA |
| Dust Generation | Zero-dust formula |
Right out of the bottle, this 3D One Car Scratch & Swirl Remover feels surprisingly lightweight yet sturdy in your hand. The smooth, almost silky texture of the compound hints at how easy it will be to spread and work into your paint.
Once you start applying it, you’ll notice it spreads effortlessly without needing much pressure. The formula’s zero-dust characteristic is a game-changer—no mess flying around or settling on nearby surfaces.
It feels like a true hybrid, combining cutting power and finishing polish in one step, which instantly saves you time.
During use, I found that whether you’re by hand or using a dual-action polisher, 3D One adapts seamlessly. It’s forgiving enough for beginners but still delivers professional results.
The gloss it builds up is impressive, and you can see the swirl marks and oxidation melting away as you work.
What really stood out is how quickly it corrected faded paint without leaving behind haze or residue. You don’t need to go over the same spot repeatedly, which is a huge plus.
Plus, knowing it’s made in the USA and developed by industry pros gives you confidence in its long-lasting performance.
Overall, this product simplifies your detailing process, making it ideal for anyone who wants a fast, effective solution. Whether for a quick touch-up or a full panel correction, it handles both with ease.
It’s the kind of product that leaves your car looking freshly polished and mirror-like—without the hassle.
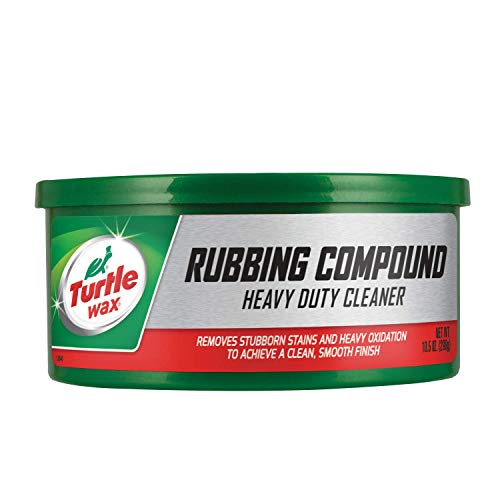
Turtle Wax T-230A Rubbing Compound & Cleaner 10.5 Fl Oz
- ✓ Heavy-duty cleaning power
- ✓ Versatile for multiple surfaces
- ✓ Easy to use and wipe off
- ✕ Takes some effort on tough stains
- ✕ Not quick for large areas
| Form | Paste |
| Application | Dull and weathered vehicle finishes, oxidation, scratches, blemishes |
| Size | 10.5 fl oz (310 ml) |
| Brand | Turtle Wax |
| Intended Use | Automotive surface cleaning and polishing |
| Compatibility | Suitable for RV and other vehicle surfaces |
You grab the Turtle Wax T-230A and squeeze out a small dollop onto your rag. As you start working it into your RV’s faded, dull surface, you immediately notice how thick and paste-like it is — not runny or messy.
It feels substantial in your hand, giving you confidence that it’s going to do some serious cleaning.
The instant you start rubbing, you feel the gritty texture work against the weathered finish. It’s like a mini abrasive in paste form, tackling oxidation and stubborn blemishes without requiring tons of effort.
You spot scratches beginning to fade, and the surface starts to look brighter and more refreshed.
What surprises you is how versatile it is. You can use it on other parts of the RV, like the bumpers or faded panels, and it still performs like a champ.
It’s especially helpful for badly weathered finishes, bringing back a surprising amount of shine with a little elbow grease.
After wiping off the excess, the difference is striking. The surface feels smoother, looks more vibrant, and the blemishes are visibly reduced.
The paste’s heavy-duty formula really lives up to its promise for restoring dulled finishes.
At just $7, it feels like a small price to pay for such a noticeable transformation. Just keep in mind, it’s not the fastest product if you’re in a rush, but it gets the job done thoroughly.
Overall, a solid choice for anyone wanting to bring life back to a weathered RV exterior.
What Is a Rubbing Compound and How Does It Benefit RVs?
| Type of Compound | Benefits | Usage |
|---|---|---|
| Oxidation Remover | Removes oxidation and restores shine to dull surfaces. | Used on faded RV exteriors to rejuvenate the finish. |
| Scratch Remover | Fills in and minimizes the appearance of scratches. | Ideal for light scratches and swirl marks. |
| All-in-One Compound | Cleans, polishes, and protects in one step. | Convenient for quick maintenance and detailing. |
| Popular Products | Examples include Meguiar’s M105, 3M Perfect-It, and Turtle Wax Rubbing Compound. | Choose based on specific needs and surface types. |
| Surface Preparation | Wash the RV thoroughly and dry it completely before application. | Ensure all dirt and debris are removed for best results. |
| Safety Precautions | Wear gloves and a mask to avoid inhaling dust and chemicals. | Work in a well-ventilated area and avoid direct sunlight. |
| Recommended Frequency | Every 6-12 months, depending on exposure and wear. | Adjust frequency based on environmental conditions and usage. |
What Are the Key Features to Consider When Choosing a Rubbing Compound for RVs?
| Feature | Description | Importance |
|---|---|---|
| Cutting Power | Ability to remove oxidation and scratches effectively. | Essential for restoring paint finish. |
| Ease of Use | How user-friendly the compound is during application. | Affects the overall experience for RV owners. |
| Finish Quality | The smoothness and shine achieved after application. | Determines the visual appeal of the RV. |
| Compatibility | Suitability for various types of RV finishes (gel coat, paint). | Ensures no damage to the surface. |
| Dust and Residue Removal | Effectiveness in minimizing dust and residue after application. | Prevents additional cleaning steps and enhances application efficiency. |
| Drying Time | Time required for the compound to dry before buffing. | Affects the workflow and overall time spent on the project. |
| Price and Value | Cost of the rubbing compound in relation to its performance. | Helps in determining the best budget-friendly option. |
| Safety and Environmental Considerations | Non-toxic ingredients and environmental safety of the product. | Ensures safe use around pets and the environment. |
What Are Some Recommended Rubbing Compounds for RVs?
| Brand | Type | Application Method | Best For | Price Range | User Ratings | Size/Quantity | Specific Features |
|---|---|---|---|---|---|---|---|
| 3M | Heavy Duty | Machine or Hand | Oxidation removal and deep scratches | $15 – $25 | 4.5/5 | 16 oz | Fast cutting action, leaves a high-gloss finish |
| Meguiar’s | Medium Cut | Machine | Light to moderate scratches and swirls | $10 – $20 | 4.6/5 | 12 oz | Easy to apply, non-dust formula |
| Star Brite | Marine | Hand | Quick touch-ups and light oxidation | $12 – $18 | 4.4/5 | 8 oz | Specially formulated for marine applications, UV protection |
| Polish & Protect | All-in-One | Machine or Hand | Cleaning, polishing, and protecting in one step | $20 – $30 | 4.5/5 | 16 oz | Convenient all-in-one solution, long-lasting protection |
How Do You Properly Apply Rubbing Compound to Your RV?
Proper application of rubbing compound to your RV can significantly enhance its appearance and protect the surface.
- Choose the Right Rubbing Compound: Selecting the best rubbing compound for your RV is crucial for achieving optimal results.
- Prepare the Surface: Ensuring the RV surface is clean and free of dirt or debris will facilitate better adhesion and effectiveness of the compound.
- Use the Appropriate Tools: Using the right tools, such as a foam applicator or a dual-action polisher, can help in evenly applying the compound.
- Apply the Compound: A controlled application technique is essential to avoid damaging the RV’s finish while ensuring thorough coverage.
- Buffing and Finishing: Properly buffing the surface after application can enhance shine and remove any excess compound.
Choose the Right Rubbing Compound: Selecting the best rubbing compound for your RV is crucial for achieving optimal results. Look for products specifically designed for RV surfaces that can effectively remove oxidation and scratches without causing additional damage. Brands with good reputations in the RV community often provide the best formulations for this purpose.
Prepare the Surface: Ensuring the RV surface is clean and free of dirt or debris will facilitate better adhesion and effectiveness of the compound. Wash the RV thoroughly with soap and water, and then dry it completely to prevent any contamination during the rubbing compound application. Additionally, inspect the surface for any deep scratches or areas that may require special attention.
Use the Appropriate Tools: Using the right tools, such as a foam applicator or a dual-action polisher, can help in evenly applying the compound. A dual-action polisher can save time and effort, providing a consistent finish, while foam applicators allow for more detailed work in specific areas. Always follow the manufacturer’s recommendations regarding tool compatibility with the chosen rubbing compound.
Apply the Compound: A controlled application technique is essential to avoid damaging the RV’s finish while ensuring thorough coverage. Start with a small amount of compound applied to the applicator, and work it into the surface using overlapping circular motions. It’s best to work in sections, allowing you to focus on achieving a uniform finish without rushing the process.
Buffing and Finishing: Properly buffing the surface after application can enhance shine and remove any excess compound. Use a clean microfiber cloth to gently buff the area, ensuring all residue is removed and the surface is left with a brilliant shine. This step not only improves aesthetics but also helps seal the surface against future contaminants.
What Common Mistakes Should You Avoid When Using Rubbing Compound on Your RV?
When using rubbing compound on your RV, avoiding common mistakes can significantly enhance the results and protect your vehicle’s finish.
- Using the Wrong Rubbing Compound: Selecting a compound that is too abrasive for your RV’s surface can lead to scratches and damage. Always opt for compounds specifically designed for automotive or RV finishes to ensure compatibility and safety.
- Not Testing on a Small Area First: Failing to test the rubbing compound on a less visible area can result in unexpected damage to the finish. Conducting a patch test allows you to see how the surface reacts and whether the desired outcome can be achieved without harming the paint.
- Neglecting Surface Preparation: Skipping the cleaning and preparation of the surface before applying the rubbing compound can lead to poor results. Thoroughly wash and dry the RV to remove dirt, grime, and wax residues to ensure that the compound adheres properly and works effectively.
- Applying Too Much Pressure: Over-applying pressure while buffing can result in uneven surfaces or damage to the clear coat. Use a gentle touch and let the rubbing compound do the work, applying consistent pressure rather than excessive force.
- Using an Inappropriate Tool: Using the wrong applicator, such as a rough cloth or an abrasive scrubber, can damage the RV’s finish. Opt for soft, foam applicators or microfiber cloths specifically designed for polishing to achieve the best results.
- Skipping the Final Waxing Step: After using a rubbing compound, failing to apply a wax or sealant can leave the surface unprotected. Waxing not only enhances the shine but also provides a protective barrier to guard against environmental damage in the future.
- Working in Direct Sunlight: Applying rubbing compound in direct sunlight can cause it to dry too quickly, leading to streaks and uneven results. It’s best to work in a shaded area or during cooler times of the day to ensure even application and adequate working time.
How Can You Maintain Your RV’s Finish After Using Rubbing Compound?
- Waxing: Applying a high-quality RV wax after polishing helps seal the finish and protect it from UV rays and environmental contaminants.
- Regular Cleaning: Keeping your RV clean by washing it regularly with a gentle soap prevents dirt and grime from adhering to the surface, which can dull the finish.
- UV Protectant Sprays: Using UV protectant sprays can provide an additional layer of defense against sun damage, helping to preserve the shine and color of your RV.
- Storage Considerations: When not in use, store your RV in a shaded or covered area to minimize exposure to sunlight and harsh weather conditions that can degrade the finish.
- Periodic Inspections: Conducting regular inspections for scratches or signs of wear allows you to address any issues promptly, preventing further damage to the finish.
Waxing: After using rubbing compound, waxing your RV is essential as it creates a protective layer that enhances the shine while shielding the surface from UV rays, dirt, and pollutants. Choose a wax specifically formulated for RVs to ensure compatibility with the materials used in your vehicle’s finish.
Regular Cleaning: Consistent cleaning of your RV is crucial to maintaining its finish. Using a mild detergent and soft sponge helps remove dirt and grime without scratching the surface, ensuring the finish remains vibrant and intact.
UV Protectant Sprays: Applying UV protectant sprays after cleaning and waxing can significantly extend the life of your RV’s finish. These sprays form a barrier against harmful UV rays, helping to maintain the color and luster of your RV over time.
Storage Considerations: Proper storage is key to preserving your RV’s appearance. Whenever possible, keep your RV parked in a garage or under a carport to protect it from direct sunlight and extreme weather, which can lead to fading and deterioration of the finish.
Periodic Inspections: Regularly inspecting your RV for scratches and wear is an often-overlooked maintenance step. By catching and addressing these issues early, you can prevent more significant problems that may require extensive repairs or refinishing.
Related Post: