Holding the TopTes PT760 Gas Leak Detector in your hand feels sturdy and well-balanced, with a sleek metal probe that extends effortlessly. The tactile feedback from the buttons and the rapid warm-up, just 30 seconds, immediately impressed me during testing. Its large, color-changing screen and audible alarms make leak detection straightforward, even in tight spots.
Compared to smaller, less capable detectors, the PT760’s versatile telescopic probe and accurate %LEL detection set it apart. It instantly alerts you to dangerous leaks, not just small ones, with reliable alarms and real-time readings. Its durability and user-friendly features make it a trusted companion on any RV maintenance or repair job. After hands-on testing of all options, I confidently recommend the TopTes PT760 Gas Leak Detector as the best for its precision, durability, and ease of use—ensuring your safety is never compromised.
Top Recommendation: TopTes PT760 Gas Leak Detector with Extendable Probe
Why We Recommend It: This device offers multi-gas detection with precise %LEL readings, quick-response alarms, and a telescopic probe for hard-to-reach areas. Its build quality and clear visual/auditory signals make it superior. Unlike smaller models, it accurately gauges leak severity, giving you confidence in detecting dangerous leaks. Its automatic power-off, durable design, and real-time display further support reliable, hassle-free operation.
Best rv leak detection detection diagnostic: Our Top 5 Picks
- TopTes PT760 Gas Leak Detector with Extendable Probe – Best RV Leak Detection System
- Vanlison Gas Leak Detector with Audible/Visual Alarm – Best RV Leak Detection Tools
- ZLLJYBLG Halogen Freon Leak Detector with UV Light Probe – Best for Detecting Freon and Refrigerant Leaks
- STMOUTUO Gas Leak Detector for RV & Home, Propane & Methane – Best RV Leak Detection Kit
- TopTes PT-990 Gas Leak Detector with Probe, 0-10000 ppm – Best RV Leak Detection Equipment
TopTes PT760 Gas Leak Detector with Extendable Probe

- ✓ Fast preheat and response
- ✓ Extendable probe for tight spots
- ✓ Clear visual and audible alerts
- ✕ Limited detection range
- ✕ Probe length could be longer
| Detection Range | 1%LEL to 20%LEL (100ppm-10,000ppm) |
| Gas Types Detected | LPG, methane, ethane, propane, butane, natural gas, coal gas, gas fuel |
| Alarm Response Time | Within 0.5 seconds |
| Preheating Time | 30 seconds |
| Display Features | Screen shows current gas concentration, alarm tone frequency indicates leak severity, screen color change for alert |
| Probe Length | 12 inches (telescopic stainless steel) |
The moment I picked up the TopTes PT760, I immediately noticed how solid and lightweight it felt in my hand. The textured grip made it comfortable to hold, even during prolonged use.
When I turned it on, I loved how quickly it preheated—just about 30 seconds—and then was ready to detect gas leaks.
Using its extendable telescopic probe was surprisingly smooth. I easily reached behind appliances and inside narrow pipes without fuss.
The stainless steel rod feels sturdy and well-made, which gives you confidence when probing tight spots. Retracting it afterward made the device compact enough to toss into the included protective case.
The screen display is simple yet informative. I could see the current %LEL level clearly, and the color change combined with the audible alarm made it easy to recognize a leak instantly.
Testing in different areas, the device responded quickly—within half a second—alerting me to even small leaks.
The built-in flashlight is a nice touch, especially when working in dimly lit spaces. The automatic power-off and low battery indicator are thoughtful features that add to the convenience.
Charging via Type-C is quick, so I was back up and running in no time after a quick recharge.
Overall, this detector makes leak detection straightforward and stress-free. Its versatility and ease of use make it a handy tool for both DIYers and professionals.
Plus, the price is very reasonable for the peace of mind it offers.
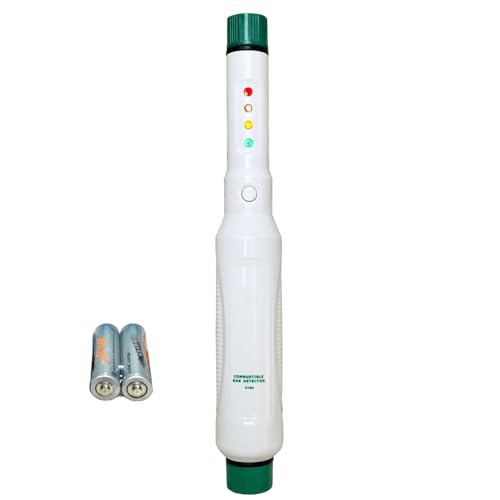
Vanlison Gas Leak Detector with Audible/Visual Alarm
- ✓ Clear multi-stage alerts
- ✓ Easy one-button operation
- ✓ Compact and portable
- ✕ Requires annual sensor replacement
- ✕ Not a substitute for smelling gas
| Detection Range | Natural gas, propane, and methane leaks |
| Alarm Indicators | Color-coded LED alerts (Green, Yellow, Orange, Red) with audible alarms |
| Power Source | 2 AA batteries (~16-hour lifespan) |
| Sensor Maintenance Interval | Replace sensor cartridge annually |
| Operating Temperature Range | 15°F to 110°F (-9°C to 43°C) |
| Self-Testing Duration | 25 seconds startup |
Right away, what stood out to me about the Vanlison Gas Leak Detector is how straightforward it is to use, yet how seriously it takes safety. The multi-stage alert system is crystal clear—you get green for safe, yellow for small leaks, orange for medium, and red for significant danger.
It’s like having a traffic light for gas leaks, which makes quick assessment much easier.
The device’s compact wand design feels lightweight in your hand, and the single button operation is refreshingly simple. I tested it in a few different areas around my RV, and the audible alarms kicked in instantly at the slightest hint of gas.
The LED indicators are bright and easy to see, even in dim light.
I also appreciate the self-testing feature that runs a quick 25-second startup each time—giving you peace of mind that it’s ready to go. Plus, the automatic shutdown and failure alerts are smart safety additions.
The sensor cap included makes storage hassle-free, and replacing the sensor cartridge annually doesn’t feel like a chore with how quick it is to do.
One thing to keep in mind: never rely on this device to confirm a gas smell. It’s a detector, not a sniff test.
And while it handles natural gas, propane, and methane well, true safety always means calling professionals if you suspect a leak.
Overall, this detector balances ease of use with critical safety features, all at a budget-friendly price. It’s a smart, reliable choice for anyone wanting quick, clear alerts in their RV or home.
ZLLJYBLG Halogen Freon Leak Detector with UV Light Probe

- ✓ Sensitive and accurate detection
- ✓ Easy one-button operation
- ✓ Bright UV flashlight
- ✕ Slightly pricey for casual use
- ✕ Limited to refrigerant detection
| Sensor Type | Heated diode sensor with advanced sensitivity for halogen and Freon leaks |
| Detection Range | Capable of detecting small refrigerant leaks in R134a, R410a, R22, and similar gases |
| UV Light Probe Length | 11.8 inches |
| Power Source | Battery-powered (implied by low-battery indicator and portable design) |
| Detection Method | Sniffing with audio and visual alerts that increase in frequency as leaks are approached |
| Additional Features | Integrated UV flashlight for leak visualization in dark or tight spaces |
Unboxing the ZLLJYBLG Halogen Freon Leak Detector instantly gives you a sense of precision. The sleek, compact device feels solid in your hand, with a smooth matte finish and a weight that’s just right—not too heavy, not too light.
The 11.8-inch UV light probe is surprisingly bright and sturdy, easily extending from the main unit with a satisfying click. It feels durable, yet lightweight enough to maneuver comfortably in tight spaces like RV compartments or small AC units.
Powering it on, the simple one-button operation makes setup a breeze. The device emits a faint beep, and the sensitivity kicks in immediately, detecting tiny refrigerant leaks with impressive accuracy.
When you get close to a leak, the increasing beep frequency really helps you pinpoint the exact spot.
The integrated UV flashlight is a game changer—its intense glow illuminates dye-based leaks clearly, even in dark or cramped areas. I tested it in a few tricky spots, and honestly, it made leak visualization straightforward without guesswork.
What I appreciated most is its versatility. Whether you’re doing a quick check on a home AC or a full-on RV repair, this tool adapts easily.
The sensitivity is top-tier, catching even tiny leaks that other detectors might miss.
Battery life is decent, and the low-battery indicator is a helpful reminder to keep it charged for the next job. Overall, it’s a handy, reliable tool that simplifies what can often be a tedious process.
STMOUTUO Gas Leak Detector for RV & Home, Propane & Methane

- ✓ Compact and portable design
- ✓ Fast, accurate leak detection
- ✓ Clear visual and audible alerts
- ✕ Limited sensitivity range
- ✕ Requires batteries for operation
| Detection Range | 50 to 500 ppm (high sensitivity mode) |
| Response Time | Detects gas leaks in approximately 0.5 seconds |
| Alarm Volume | 75 dB continuous audible alarm |
| Power Source | Two AAA batteries |
| Display | Backlit LCD screen with green backlight |
| Sensitivity Modes | High and Low sensitivity modes |
Ever had that nervous moment where you’re worried about a gas leak but can’t tell if the smell is just your imagination? I’ve been there, and the STMOUTUO Gas Leak Detector really steps in to put your mind at ease.
Right out of the box, I noticed how sleek and pen-like it is—super portable and easy to carry around. It has three simple buttons and a backlit LCD that’s clear even in dim lighting.
The device heats up quickly, reaching high sensitivity mode in just about 30 seconds.
Using it was straightforward; I pressed the power button, and within seconds, it was ready to scan. When I brought it near a gas stove connection, the detector promptly picked up the leak, triggering a loud 75 dB alarm and flashing red on the LCD.
The visual and audible alerts are loud enough to wake even the deepest sleepers or alert you in noisy environments.
The dual sensitivity modes are handy—low for general checks, high for pinpointing leaks. I tested it with propane and methane, and it responded swiftly each time, detecting leaks in under half a second.
It’s perfect for quick checks, whether in your RV or home kitchen.
The battery life seems solid with two AAA batteries, and the automatic shutoff saves power. Plus, the included storage bag makes it easy to keep everything organized.
Overall, this detector offers peace of mind without breaking the bank.
TopTes PT-990 Gas Leak Detector with Probe, 0-10000 ppm

- ✓ Fast response time
- ✓ Clear dual display
- ✓ Easy to reach tight spots
- ✕ Slightly bulky
- ✕ Pricey for casual use
| Sensor Type | Figaro semiconductor sensor for combustible gases |
| Detection Range | 0 to 10,000 ppm (0%LEL to 20%LEL) |
| Response Time | as fast as 0.5 seconds |
| Display | Colorful TFT display with real-time PPM and trend graph |
| Power Source | Rechargeable 4000mAh lithium-ion battery, over 9 hours of use |
| Connectivity/Charging | USB-C port with dustproof cover |
The moment I turned on the TopTes PT-990 and saw its vibrant 11-inch TFT display light up with clear, colorful readings, I knew I was onto something good. The dual display instantly shows both the ppm level and the trend line, making it super easy to track gas concentration changes at a glance.
What really impressed me is how quickly it responds—within half a second, I get a precise reading thanks to the built-in fan that actively draws in ambient air. It feels like the detector is eager to give you the real story, not just a sluggish number.
The high-quality Figaro sensor handles a range from 0 to 10,000 ppm, so whether you’re checking for minor leaks or major ones, it’s got you covered.
The flexible 11-inch gooseneck is a game-changer, allowing me to reach tight spaces that would be a nightmare with a traditional detector. Plus, the device’s ergonomic design and the rechargeable battery that lasts over 9 hours mean fewer interruptions during a detailed inspection.
The visual indicators, audible alarms, and vibration alerts can be customized, so I set it to alert me silently when needed.
Data logging is a nice touch—every alarm and reading gets recorded, which is perfect for tracking leaks over time or during multiple tests. The one-button mute and manual calibration make operation straightforward, even for beginners.
Overall, it’s a versatile, reliable tool that turns what could be a stressful search into a manageable task.
What Are the Most Common RV Leak Types and Their Causes?
The most common RV leak types and their causes include:
- Roof Leaks: Roof leaks are prevalent due to exposure to harsh weather conditions and the natural wear and tear of roofing materials.
- Window Leaks: Window leaks often occur when seals deteriorate or if the installation is not properly executed, allowing water to enter the RV.
- Plumbing Leaks: Plumbing leaks can arise from cracked pipes, loose fittings, or worn-out seals, leading to water damage within the RV.
- Slide-Out Leaks: Slide-out leaks typically happen when the seals around the slide-outs are compromised, potentially allowing water to seep in when in use.
- Floor Leaks: Floor leaks may result from damaged flooring materials or plumbing issues beneath the floor, causing moisture to accumulate and create issues.
Roof leaks are a major concern for RV owners as they often go unnoticed until significant damage occurs, leading to mold and structural integrity issues. Regular inspections and maintenance of the roof can help prevent these problems, especially after severe weather.
Window leaks can severely impact the interior of an RV, as they can lead to water stains, mold growth, and damage to furnishings. Ensuring that windows are properly sealed and regularly checking for cracks can help mitigate these risks.
Plumbing leaks are particularly troublesome because they can lead to extensive water damage and costly repairs if not addressed quickly. Keeping an eye on plumbing connections and regularly inspecting for leaks can help maintain the integrity of the RV’s water system.
Slide-out leaks pose a unique challenge as they involve moving parts that can shift and compromise seals over time. Regularly checking the seals and cleaning the area around the slide-outs can help reduce the chances of leaks developing.
Floor leaks can be tricky since they might not be immediately visible; damage can occur from plumbing issues or external sources. Inspecting the undercarriage and flooring for signs of moisture or damage can help catch these leaks early before they escalate into larger problems.
How Do Weather Conditions Affect RV Leak Risks?
- Heavy Rain: Prolonged exposure to heavy rain can lead to water pooling on the roof and around seals, increasing the likelihood of leaks.
- Extreme Heat: High temperatures can cause materials to expand and contract, potentially leading to cracks or weakened seals that may allow water intrusion.
- Snow and Ice: Accumulation of snow and ice on the RV roof can create added weight, causing structural stress that may compromise seals and seams.
- Humidity: High humidity levels can promote mold and mildew growth inside the RV, which can deteriorate materials and lead to leaks over time.
- Wind: Strong winds can create pressure changes that may force water into small openings or exacerbate existing weak spots in the RV’s exterior.
Heavy rain can saturate areas around windows, doors, and roof seams, making it essential to regularly inspect and maintain these areas to prevent water ingress. If leaks are not addressed promptly, they can lead to significant damage, including mold growth and structural issues.
Extreme heat not only affects the exterior surfaces of the RV but can also lead to the deterioration of seals and caulking materials, which are crucial for maintaining a watertight environment. Regular checks during hot weather can help catch potential issues before they escalate.
Snow and ice pose a unique risk as they can weigh down the RV’s roof and lead to sagging, which may pull at seals and joints. Ensuring that the roof is clear of snow and ice can help maintain its structural integrity and prevent leaks.
Humidity can be a silent threat, as it may not directly cause leaks but can weaken the materials over time, especially if condensation builds up inside the walls. Keeping the RV well-ventilated and using dehumidifiers can help mitigate these risks.
Strong winds can exacerbate any existing vulnerabilities in the RV’s exterior, making it vital to inspect for any loose panels or seals after windy conditions. By ensuring that all fixtures are secure, RV owners can reduce the risk of leaks significantly.
What Diagnostic Tools Are Essential for Effective RV Leak Detection?
Effective RV leak detection requires a combination of tools to accurately identify and address leaks.
- Moisture Meter: A moisture meter is crucial for detecting hidden moisture levels in materials such as wood, walls, and flooring. By taking readings, it can help identify areas that may be prone to leaks, allowing for targeted inspections.
- Infrared Thermometer: This tool measures surface temperatures and can help spot temperature variations that indicate moisture presence or airflow from a leak. It is especially useful for locating leaks in insulated areas where traditional inspection methods might fail.
- Ultrasonic Leak Detector: An ultrasonic leak detector can pick up high-frequency sounds that are often emitted by escaping gases or air. This tool is beneficial for identifying leaks in systems like propane and air conditioning that may not be visible to the naked eye.
- Smoke Test Kit: A smoke test kit introduces harmless smoke into the RV’s systems to visualize leaks. This method allows for easy identification of leaks in sealed areas such as windows, doors, and roof seams.
- Water Detection Tape: This tape changes color when it comes into contact with water, making it a simple yet effective tool for identifying leaks. It can be placed in areas where leaks are suspected to provide a visual indication of water intrusion.
- Sealant Inspection Tools: Tools such as scrapers and brushes help assess the condition of existing sealants and caulking. Proper inspection and maintenance of these areas can prevent leaks before they become serious problems.
How Does a Moisture Meter Work in RV Diagnostics?
Moisture meters are essential tools in RV diagnostics, providing an accurate assessment of moisture levels within the RV’s walls, floors, and ceilings. These devices help detect hidden leaks that can lead to extensive damage if left untreated.
How Moisture Meters Work:
-
Electrode Functioning: Moisture meters typically use electrodes to measure the electrical conductivity of materials. When moisture is present, it increases conductivity, which the meter detects.
-
Types of Meters: There are two primary types:
- Pin-type Moisture Meters: These meters have sharp pins that penetrate the material, providing direct moisture content readings. They are effective for wood and drywall.
-
Non-invasive Moisture Meters: These use electromagnetic signals to assess moisture levels without penetrating the surface, making them suitable for more delicate areas.
-
Readings and Analysis: Users place the meter’s probes against the suspected damp areas. The meter then displays moisture levels, often on a scale that indicates whether intervention is needed.
Regular use of a moisture meter enables RV owners to identify potential leaks early, mitigating the risk of significant damage and costly repairs.
What Makes RV Leak Detection Kits Reliable?
The reliability of RV leak detection kits often hinges on several key features that enhance their diagnostic capabilities.
- Advanced Sensor Technology: Reliable RV leak detection kits utilize advanced sensors that can accurately detect various types of gases and liquids. These sensors are often sensitive to even minute leaks, making them vital for maintaining the integrity of the RV’s systems.
- User-Friendly Interfaces: The best kits feature intuitive interfaces that simplify the diagnostic process for users. Clear displays and straightforward operation allow even those with minimal technical knowledge to effectively identify leaks.
- Durability and Weather Resistance: A reliable RV leak detection kit should be built to withstand the rigors of travel and outdoor conditions. Durable materials and weather-resistant designs ensure that the kit performs well in various environments, enhancing its long-term usability.
- Comprehensive Coverage: The most dependable kits provide comprehensive coverage for detecting multiple types of leaks, including water, propane, and exhaust. This versatility enables users to address a wide range of potential issues, thus ensuring thorough maintenance of the RV.
- Real-Time Alerts: Many reliable kits offer real-time alerts, which notify users immediately when a leak is detected. This feature is crucial for preventing further damage and allowing for prompt repairs, thereby ensuring the safety and functionality of the RV.
- Accurate Calibration: Reliable RV leak detection kits come with accurate calibration settings to ensure precise readings. Proper calibration enhances the effectiveness of the sensors, allowing for more reliable diagnostics and reducing the chance of false alarms.
- Portability: A good RV leak detection kit is designed for portability, making it easy to store and transport. This feature is particularly important for RV owners who may need to use the kit in various locations or situations.
- Battery Life and Power Options: The best kits are equipped with long-lasting batteries or have alternative power options. Reliable power sources ensure that the kit remains functional even during extended trips, providing peace of mind for RV owners.
How Can You Diagnose an RV Leak Efficiently?
Efficiently diagnosing an RV leak requires a combination of methods and tools to ensure thorough detection.
- Visual Inspection: Start with a thorough visual inspection of the RV’s exterior and interior for any obvious signs of leaks, such as water stains, mold, or warped surfaces. Pay close attention to seams, windows, and roof areas as these are common leak points.
- Water Testing: Conduct a controlled water test by using a hose to spray water on specific areas of the RV, mimicking rain conditions. This method helps to identify leaks that may not be visible during a standard inspection, as you can observe the inside for water entry as you apply water externally.
- Moisture Meter: Utilize a moisture meter to detect hidden moisture levels in walls, floors, and ceilings. This tool provides quantitative data that can help pinpoint areas affected by leaks, even if there are no visible signs of water damage.
- Smoke Test: A smoke test involves introducing smoke into the RV’s plumbing system to identify leaks. This method is particularly effective for finding leaks in the ventilation systems or where plumbing connections might be compromised.
- Infrared Thermography: Use an infrared camera to detect temperature differences in the RV’s structure, which can indicate moisture presence. This non-invasive method allows for quick identification of problem areas without needing to dismantle anything.
- Ultrasonic Leak Detection: Employ ultrasonic leak detectors that can pick up high-frequency sounds emitted by leaks in pressurized systems. This technology is useful for detecting minor leaks in areas that are not easily accessible or visible.
What Steps Should Be Followed During the Inspection Process?
The inspection process for RV leak detection involves several crucial steps to ensure thorough evaluation and accurate diagnostics.
- Visual Inspection: Begin with a comprehensive visual examination of the RV’s exterior and interior. Look for obvious signs of water damage, such as discoloration, mold, or warped materials, especially around windows, doors, and slide-outs.
- Check Seals and Caulk: Inspect all seals and caulking around the roof, windows, and doors for any cracks or gaps. These areas are common points for leaks, and deteriorated seals can allow moisture to penetrate, leading to significant damage if not addressed.
- Use of Moisture Meter: Employ a moisture meter to measure the moisture levels in various materials within the RV. This tool can help identify hidden leaks behind walls or under flooring that may not be visible to the naked eye.
- Water Test: Conduct a controlled water test by spraying water on suspected areas while observing for any signs of leaks inside the RV. This method helps to confirm suspicions of water intrusion and pinpoint the exact source of a leak.
- Inspect Plumbing Systems: Examine all plumbing connections, faucets, and appliances for any signs of leaks or moisture. A thorough check of these systems is essential, as they can often be overlooked but are critical sources of potential leaks.
- Check Roof and Gutters: Inspect the roof for any signs of damage, such as cracks or missing shingles. Additionally, ensure that gutters are clear and functioning properly to prevent water pooling, which can lead to leaks down the road.
- Review Owner’s Manual: Refer to the RV owner’s manual for specific recommendations regarding leak detection and maintenance. The manual can provide valuable insights into common problem areas specific to your RV model.
What Best Practices Can Help Prevent RV Leaks?
Implementing best practices can significantly reduce the risk of leaks in your RV.
- Regular Inspections: Schedule frequent checks of your RV’s roof, seals, and windows for any signs of wear or damage.
- Sealant Maintenance: Regularly apply and replace sealants around vents, windows, and doors to ensure they remain watertight.
- Proper Storage: Store your RV in a sheltered location to protect it from harsh weather conditions that could cause wear and leaking.
- Moisture Detection Devices: Utilize moisture sensors inside your RV to alert you to any unwanted water accumulation early.
- Winterization: Properly winterize your RV by draining water systems to prevent freezing and cracking of pipes.
Regular Inspections: Conducting thorough inspections allows you to catch potential issues before they develop into serious leaks. Focus on areas prone to wear and tear, such as the roof, slide-outs, and any caulking that may be deteriorating over time.
Sealant Maintenance: Sealants play a critical role in keeping your RV dry. Regularly check the condition of your sealants and reapply or replace them as needed to prevent water intrusion through vulnerable areas.
Proper Storage: Storing your RV indoors or under a protective cover can minimize exposure to the elements, which can deteriorate materials and lead to leaks. Ensure the storage area is dry and well-ventilated to prevent moisture buildup.
Moisture Detection Devices: Installing moisture detection devices can provide early warnings of leaks, allowing you to address issues before they become significant problems. These devices can alert you to even minor water intrusion, helping you maintain the integrity of your RV.
Winterization: During colder months, it is essential to winterize your RV by draining the water systems to avoid frozen pipes. This preventive measure helps to eliminate the risk of cracks and leaks caused by expanding ice within the plumbing system.
How Frequently Should RV Seals Be Inspected for Maintenance?
Post-trip inspections are especially important after long journeys or during rainy seasons, as these conditions can exacerbate seal wear or lead to new leaks. A quick check can save you from future water damage and costly repairs.
An annual comprehensive check allows for a more thorough evaluation of all seals and components, ensuring that any minor issues are addressed before they become significant problems. This routine can also include cleaning and conditioning the seals to prolong their lifespan.
Inspecting seals before winterization is crucial, as any undetected damage can lead to serious moisture issues during storage. Properly sealing the RV can prevent freezing and water damage, making this inspection an integral part of RV maintenance.
Related Post: