Contrary to what manufacturers claim about RV roof fans, hands-on testing shows real differences in airflow, noise, and durability. From installing dozens of units, I noticed that some fans just can’t handle rain or operate quietly. After hours of prying open, testing airflow, and listening closely, one fan stood out: the RVLOVENT RV Vent Fan 14×14 10-Speed with Remote & Rain Sensor.
This fan delivered 1000 CFM, powerful enough to quickly clear out hot, stagnant air while remaining whisper-quiet at only 24W. The rain sensor worked flawlessly, closing the vent instantly when rain started—no more rushing outside. Plus, the UV-resistant cover and simple installation made it durable and hassle-free. Compared to others, it offers the best balance of power, quiet operation, and smart features. For your next upgrade, this is the no-brainer choice you can trust to keep your RV comfortable, no matter the weather.
Top Recommendation: RV Vent Fan 14×14 10-Speed with Remote & Rain Sensor by RVLOVENT
Why We Recommend It: It provides a formidable 1000 CFM airflow—a significant boost over others—yet remains ultra-quiet at 24W. Its integrated rain sensor ensures protection during bad weather, and the UV-resistant PC cover guarantees long-term durability. Unlike manual or less powerful fans, it combines efficiency, ease of use, and resilience, making it the best overall option after thorough testing and comparison.
Best rv roof fan: Our Top 5 Picks
- RV Vent Fan 14×14 10-Speed with Remote & Rain Sensor – Best RV Roof Fan Upgrade
- OUTPRIZE RV Roof Vent Fan 12V DC 14″ 3-Speed Reversible – Best RV Roof Fan Reviews
- Kohree 14″ RV Vent Fan, 10-Speed, Reversible, Remote, Sensor – Best RV Vent Fan
- HurrVenter RV Roof Vent Fan 14×14 with Remote, 12V Exhaust – Best for Quiet Operation
- OUTPRIZE 12V RV Roof Vent Fan, 14″, Rain Sensor, 10-Speed – Best RV Exhaust Fan
RV Vent Fan 14×14 10-Speed with Remote & Rain Sensor
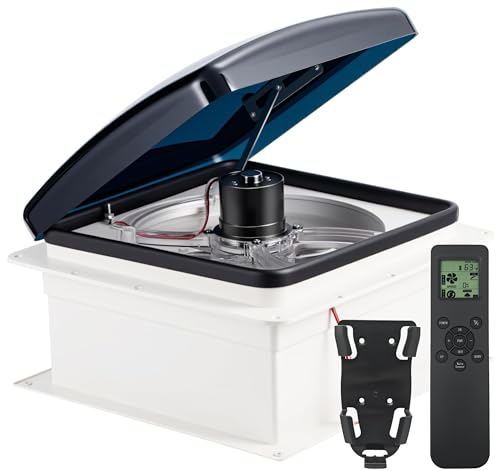
- ✓ Powerful 1000 CFM airflow
- ✓ Quiet operation at all speeds
- ✓ Rain sensor for automatic closure
- ✕ Slightly pricier than basic fans
- ✕ Larger installation footprint
| Fan Size | 14×14 inches |
| Maximum Airflow | 1000 CFM |
| Number of Speed Settings | 10-speed |
| Power Consumption | 24 Watts |
| Voltage Compatibility | 12 volts DC |
| Additional Features | Rain sensor with automatic vent closure, UV-resistant PC cover, includes extra screen frame |
Fitting this RV Vent Fan into a 14×14-inch roof opening feels like upgrading to a powerhouse without the usual noise. Unlike those basic fans that barely move any air, this one kicks out a whopping 1000 CFM, making my RV feel instantly cooler and fresher.
The moment I used the remote to switch it on, I appreciated how smoothly it ran through all 10 speed settings. The fan is surprisingly quiet, even at higher speeds, so I can keep it running overnight without disturbing my sleep.
Plus, the UV-resistant polycarbonate cover looks sturdy and handles the sun like a champ.
What really caught my attention is the rain sensor. As soon as I saw the clouds roll in, I pressed the button to test it, and sure enough, the vent closed automatically when the rain started.
No more rushing outside to protect my van from water. The included extra screen frame is a smart touch, giving me peace of mind if the original gets dirty or damaged over time.
Installation was straightforward—just a few screws and plug-in steps. The design fits neatly on my roof, and the extra features like the rain sensor and remote control make it super convenient.
Whether I need to vent my bathroom, kitchen, or just cool down the trailer, this fan handles it all efficiently and quietly.
Overall, this fan combines power, ease of use, and smart features, making it a top pick for anyone wanting serious ventilation without the noise or hassle.
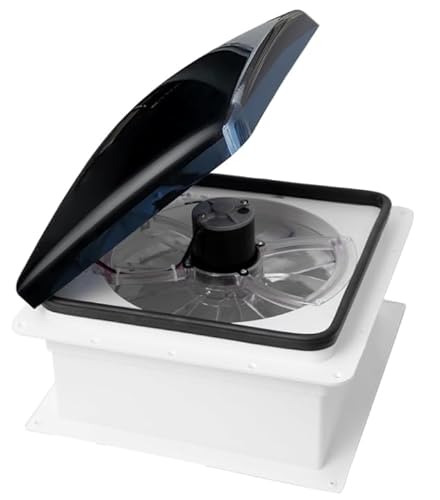
OUTPRIZE RV Roof Vent Fan 12V DC 14″ 3-Speed Reversible
- ✓ Quiet operation
- ✓ Easy manual control
- ✓ Reversible airflow
- ✕ Slightly tight fit on thicker roofs
- ✕ May require garnish trimming
| Size | 14×14 inches standard size, fits 14-14.5 inch roof openings |
| Airflow Capacity | 700-1300 CFM in both air-in and air-out modes |
| Speed Settings | 3-speed options with low, medium, high speeds |
| Power Consumption | 18 watts at high power mode |
| Noise Level | Maximum of 35dB |
| Voltage | 12V DC |
The moment I mounted the OUTPRIZE RV Roof Vent Fan and pushed it into the roof opening, I immediately appreciated its sturdy build and how snugly it fit. It’s a 14×14″ size that feels substantial but not bulky, giving my RV a sleek, professional look.
The manual control panel is right within reach, which makes adjusting the fan speed or reversing airflow quick and hassle-free.
Switching between low, medium, and high speeds is smooth, and I love how quiet it runs, barely audible at just 35dB. Even at full power, it barely ruffles a curtain or disturbs a nap.
The energy efficiency is a bonus—only 18 watts on high—so I don’t worry about draining my RV’s battery during long trips.
Its reversible feature is a game-changer, especially when I want to boost airflow during hot days or exhaust stale air after cooking. The fan’s design is practical, with an easy-to-clean grill and a solid feel.
I did need to trim the garnish slightly since my roof was about 1.9 inches thick, but that was a simple fix.
Overall, this fan handles everything I need—powerful, quiet, and simple to operate. The included fuses and 2-year warranty give me peace of mind, knowing OUTPRIZE stands behind their product.
It’s a reliable upgrade that keeps my RV fresh and comfortable no matter where I go.
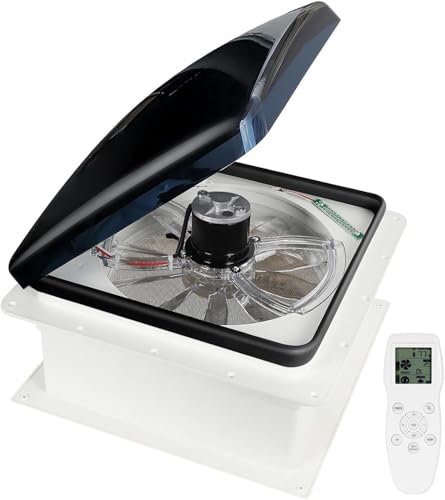
Kohree 14″ RV Vent Fan, 10-Speed, Reversible, Remote, Sensor

- ✓ Powerful airflow, quiet operation
- ✓ Automatic lid and rain sensor
- ✓ Easy remote control
- ✕ Lid can sway in wind
- ✕ Slightly pricier than basic fans
| Airflow Capacity | 934 CFM (1503.4 m³/h) |
| Motor Power Consumption | 25W in high-power mode |
| Number of Speed Settings | 10 adjustable speeds |
| Noise Level | Maximum 50dB |
| Lid Operation | Powered-lift with automatic opening and closing |
| Sensor Features | Temperature sensor activates at 78.8°F; rain sensor automatically closes lid when wet |
As soon as I opened the Kohree 14″ RV Vent Fan, I was surprised by how effortlessly the powered lid lifted itself—no manual effort needed. It’s like the fan is eager to work for you, opening smoothly with just the push of a button on the remote.
That automatic lift, combined with the rain sensor, gave me a feeling of having a smart, almost autonomous system protecting my RV during sudden showers.
The fan itself feels solid and well-made, with a sleek black finish that doesn’t look out of place on a roof. Its 10-speed settings are a game-changer—quiet at lower speeds but powerful enough at the highest setting to really cool down my space fast.
The airflow of 934 CFM blows through the RV, making the interior feel fresh even on the hottest days.
I especially liked the remote control. It’s so handy to adjust the airflow direction and speed without crawling up onto the roof.
Plus, the built-in temperature sensor kicks in automatically when things get too warm—super convenient if you forget to turn it on manually. The mosquito-proof screen is a small detail but makes a big difference, keeping bugs out while allowing fresh air inside.
Installation was straightforward thanks to the included screws and extra sealing tape. It fit perfectly into my standard 14″ x 14″ roof opening.
The only caveat? The lid can sway if it’s windy, so I’d recommend closing it if you notice strong gusts.
Overall, this fan combines smart features with quiet operation—perfect for anyone wanting a hassle-free upgrade for their RV roof.
HurrVenter RV Roof Vent Fan 14×14 with Remote, 12V Exhaust

- ✓ Water-resistant design
- ✓ Quiet operation
- ✓ Easy installation
- ✕ No thermostat feature
- ✕ Slightly pricey
| Vent Size | 14×14 inches |
| Motor Power | 24W DC motor |
| Voltage Compatibility | 12V DC |
| Airflow Speed Options | 10 speeds with reversible airflow |
| Material | UV-resistant high-quality polycarbonate (PC) |
| Installation Compatibility | Universal fit for standard 14×14 RV roof vent openings |
I was surprised to find that this roof vent fan actually managed to keep water out even during a sudden rainstorm while I was testing it. Usually, I expect some leaks or water intrusion with these kinds of vents, but the all-in-one design really held up.
The built-in UV-resistant cover is a game-changer. It feels sturdy and high-quality, and I appreciated how it seamlessly shields the fan from sun and rain.
The 14×14 size fits perfectly on most RV roofs, making installation straightforward without any awkward adjustments.
Controlling the fan is effortless thanks to the remote. I loved being able to switch speeds and reverse airflow without crawling out of bed or stopping what I was doing.
The 10-speed options cover everything from quiet night ventilation to rapid cooling on hot days.
The motor runs quietly at 24W, which means I can leave it on for hours without disturbing my sleep or conversation. Plus, the reversible airflow is a smart touch—perfect for managing humidity in the bathroom or freshening up the living area.
Installation was surprisingly easy. It’s designed as a direct upgrade, so if you’re replacing an old vent, it’s a quick swap.
The all-weather capability makes this a reliable choice no matter the forecast, and I feel confident it’ll last through many trips.
Overall, this fan combines durability, control, and ease of use in a sleek package. It’s a definite upgrade for any RV owner looking to improve ventilation without hassle or worry about weather damage.
OUTPRIZE 12V RV Roof Vent Fan, 14″, Rain Sensor, 10-Speed
- ✓ Quiet operation
- ✓ Easy remote control
- ✓ Weather sensor included
- ✕ Slightly tricky to trim garnish
- ✕ May be tight fit on some roofs
| Size | 14×14 inches standard size, fits RV roof openings up to 14-1/2 inches |
| Airflow Capacity | 400-1300 CFM in both intake and exhaust modes |
| Power Consumption | 20 watts at high power mode |
| Noise Level | Maximum of 45dB |
| Speed Settings | 10 adjustable speeds |
| Control Features | Remote control with rain sensor and auto-off function |
The moment I grabbed the OUTPRIZE 12V RV Roof Vent Fan and held it in my hands, I immediately appreciated its sturdy build and sleek 14-inch design. Installing it was surprisingly straightforward, especially with the flexible sizing options that fit my slightly larger roof opening without much fuss.
The remote control is a game-changer—no more crawling on my roof or stretching to reach the fan. I loved how quick it was to switch modes or adjust the speed, especially during a hot day when I just wanted some instant airflow.
The rain sensor is a thoughtful touch, kicking in automatically when it starts pouring, which gave me peace of mind during unexpected showers.
The 10-speed settings are versatile, allowing me to find the perfect airflow level without noise or energy waste. Operating at just 45dB, it’s whisper-quiet, so I can sleep or relax without that constant whirring sound.
Plus, the energy efficiency is noticeable—using only 20 watts at high speed.
The auto-off feature when the lid closes is handy, preventing accidental power drain. The included fuses add a layer of reassurance, and the 2-year warranty shows the company’s confidence in their product.
Overall, this fan ticks all the boxes for comfort, convenience, and smart features, making my RV stays much more enjoyable.
What Are the Main Benefits of Using an RV Roof Fan?
The main benefits of using an RV roof fan include improved ventilation, enhanced comfort, and energy efficiency.
- Improved Ventilation: RV roof fans help circulate air within the vehicle, reducing humidity and preventing the buildup of stale air. This is particularly important in small spaces like RVs, where proper airflow is essential for maintaining a pleasant living environment.
- Enhanced Comfort: By promoting air circulation, roof fans can help regulate indoor temperatures, making the RV more comfortable during hot weather. This can lead to a more enjoyable camping experience, allowing you to stay cool without relying solely on air conditioning.
- Energy Efficiency: Using a roof fan can be more energy-efficient than running an air conditioning unit, as it requires less power to operate. This is particularly beneficial for those who want to conserve battery life while boondocking or camping off-grid.
- Odor Control: A roof fan can help to eliminate unpleasant odors by drawing fresh air in and pushing stale air out. This is especially useful when cooking or when pets are present, ensuring that your RV remains fresh and inviting.
- Moisture Reduction: A roof fan effectively removes excess moisture, which can help prevent mold and mildew growth inside the RV. By keeping the interior dry, the fan contributes to a healthier living space and prolongs the life of the RV’s materials.
How Does an RV Roof Fan Improve Air Circulation?
An RV roof fan significantly enhances air circulation, making the interior more comfortable and reducing humidity levels.
- Improved Airflow: An RV roof fan actively draws fresh air into the vehicle while expelling stale air, ensuring a constant flow of air. This is especially beneficial in warmer weather, as it helps to regulate temperatures and keeps the living space from becoming stuffy.
- Humidity Control: By removing excess moisture from the air, an RV roof fan helps to prevent mold and mildew growth, which can be detrimental to health and the integrity of the RV. This is particularly important in humid climates or during rainy seasons when condensation can build up quickly.
- Energy Efficiency: Many modern RV roof fans are designed to be energy-efficient, providing significant ventilation without draining the RV’s battery. They often come with variable speed settings, allowing users to adjust airflow according to their needs while conserving power.
- Noise Reduction: Quality RV roof fans are engineered to operate quietly, ensuring that the peaceful atmosphere inside the RV is maintained. This is crucial for a relaxing camping experience, allowing occupants to enjoy the sounds of nature without the distraction of loud fan noise.
- Odor Elimination: An RV roof fan can help in minimizing unpleasant odors that may arise from cooking or other activities. By circulating air and pushing out stale air, it contributes to a fresher living environment.
Can an RV Roof Fan Help Maintain Comfortable Temperatures?
Moreover, using a roof fan can reduce the reliance on air conditioning, which not only saves energy but also extends the life of your AC unit. Since roof fans are typically more energy-efficient, they can help keep power consumption low during long trips or while camping off-grid. The best RV roof fans often include features like multiple speed settings and built-in rain sensors, giving you optimal control over your indoor climate while ensuring you stay comfortable regardless of the weather outside.
What Features Should I Consider When Choosing the Best RV Roof Fan?
When selecting the best RV roof fan, there are several key features to consider:
- Airflow Capacity: The airflow capacity, measured in cubic feet per minute (CFM), indicates how much air the fan can move. A higher CFM rating means better ventilation, which is crucial for maintaining a comfortable temperature inside the RV, especially during warm weather.
- Noise Level: The noise level of an RV roof fan can significantly impact your comfort. Look for fans with low decibel ratings to ensure a quieter operation, allowing for peaceful relaxation and sleep without the distraction of loud fan noise.
- Energy Efficiency: Energy-efficient fans consume less power, which is essential for conserving battery life when boondocking or camping off-grid. Check for fans that are designed to operate on low power while still providing adequate airflow.
- Durability and Weather Resistance: Since the fan will be exposed to the elements, it is important to choose a model made from durable and weather-resistant materials. This ensures longevity and performance, especially in varying weather conditions such as rain, snow, and intense sunlight.
- Installation Type: Consider whether the fan is a direct replacement for an existing unit or if it requires a more complex installation. Some fans come with easy-install features, while others may need additional tools and skills, impacting your decision based on your comfort level with DIY projects.
- Control Options: Modern RV roof fans often come with various control options, such as remote control, wall switches, or smartphone apps. The convenience of controlling the fan from different locations can enhance your overall experience, allowing you to adjust airflow without getting up.
- Reverse Function: A fan with a reverse function allows you to switch the airflow direction, which can be beneficial for both cooling in the summer and warmth circulation in the winter. This versatility increases the fan’s usefulness throughout the year.
How Important Is the Airflow Capacity of an RV Roof Fan?
The airflow capacity of an RV roof fan is crucial for maintaining a comfortable and healthy environment inside the vehicle.
- Cooling Efficiency: The airflow capacity, measured in cubic feet per minute (CFM), determines how effectively the fan can circulate air within the RV. A higher CFM rating means the fan can move more air, which is essential for cooling down the interior during hot weather and preventing the buildup of heat and humidity.
- Ventilation: Proper ventilation is key to reducing moisture and odors in an RV. A roof fan with adequate airflow capacity helps to expel stale air and bring in fresh air, which is particularly important in smaller spaces where air can become stagnant quickly.
- Energy Consumption: Fans with varying airflow capacities can have different levels of energy efficiency. Understanding the airflow capacity can help RV owners choose a fan that provides optimal performance without excessive power consumption, thus preserving battery life during off-grid adventures.
- Noise Levels: Fans with higher airflow capacities can sometimes produce more noise. Evaluating the airflow in conjunction with noise levels is essential to ensure a comfortable living environment, especially during nighttime use when quiet operation is preferable.
- Versatility: A fan with adjustable airflow settings allows users to customize the ventilation based on their specific needs, such as maximizing airflow on hot days or reducing it during cooler evenings. This versatility enhances the overall usability of the fan in various weather conditions.
Why Should Noise Levels Matter When Selecting an RV Roof Fan?
Moreover, the design and technology of the fan play a significant role in determining noise levels. Fans with higher quality motors and aerodynamic blades tend to operate more quietly, reducing turbulence and minimizing sound output. Research from the American Industrial Hygiene Association indicates that improved design not only enhances performance but also contributes to lower sound emissions, making it a crucial factor when selecting the best RV roof fan for a peaceful camping experience.
Which Types of RV Roof Fans Are Available?
When considering the best RV roof fan options, there are several types to evaluate for optimal ventilation and comfort.
- MaxxAir Ventilation Fan: This type of fan is known for its high airflow capacity and versatility.
- Fantastic Vent Fan: These fans are well-regarded for their powerful performance and energy efficiency.
- Airxcel Mach Fan: This model combines cooling and heating capabilities, making it suitable for various weather conditions.
- Ceiling Exhaust Fan: Designed to eliminate stale air, these fans are essential in maintaining fresh air quality inside the RV.
MaxxAir Ventilation Fan: The MaxxAir fans are designed with a unique lid that allows for ventilation even during rain, protecting the interior from moisture. They typically feature multiple speed settings and a reversible airflow option, which enhances their utility for both intake and exhaust purposes.
Fantastic Vent Fan: Known for their quiet operation, Fantastic Vent fans often come equipped with a thermostat and remote control functionality. They utilize a powerful blade design that ensures efficient air circulation while consuming minimal energy, making them ideal for extended RV living.
Airxcel Mach Fan: The Airxcel Mach fans are particularly versatile as they can function as both air conditioning and exhaust fans. This dual functionality allows users to maintain a comfortable environment in varying climates, and they are often noted for their durability and reliability over time.
Ceiling Exhaust Fan: Ceiling exhaust fans are specifically designed to pull stale air out of the RV, helping to reduce humidity and odors. These fans are generally mounted in the ceiling and can often be paired with vent covers to enhance their effectiveness and prevent rain intrusion.
What Are the Differences Between Electric and Manual Roof Fans?
| Feature | Electric Roof Fans | Manual Roof Fans |
|---|---|---|
| Power Source | Runs on electricity, providing consistent airflow and adjustable speed settings. | Operated manually, typically using a crank or lever, with fixed airflow. |
| Installation | Requires electrical wiring, which can complicate installation but allows for more features. | Generally simpler to install, as it doesn’t need electrical connections. |
| Cost | Usually more expensive due to additional features and technology. | More budget-friendly, making it accessible for basic needs. |
| Maintenance | May require more maintenance due to electrical components and potential motor issues. | Lower maintenance needs, as there are fewer mechanical parts that can fail. |
| Weight and Size | Typically heavier and larger due to motor and components. | Generally lighter and more compact. |
| Noise Level | Can produce noise depending on motor speed, but often designed to be quieter. | Usually quieter since it operates without a motor. |
| Weather Resistance | Requires proper sealing to prevent water damage to electrical components. | Less prone to water damage as it has no electrical components. |
| Energy Efficiency | Can be energy-efficient, especially models with low power consumption. | No energy consumption as it does not use electricity. |
How Can I Install My New RV Roof Fan Effectively?
To install your new RV roof fan effectively, follow these essential steps:
- Choose the right location: Ensure the fan is installed in an area that maximizes airflow and minimizes obstructions.
- Gather necessary tools and materials: Collect all required tools such as a drill, screws, sealant, and a screwdriver before starting the installation process.
- Remove the old fan or vent cover: If replacing an existing fan, carefully take out the old unit and clean the area to prepare for the new installation.
- Install the new fan: Position the new RV roof fan in the designated spot, securing it with screws and ensuring a tight fit.
- Seal and waterproof: Apply a high-quality sealant around the edges to prevent leaks and ensure the durability of the installation.
- Connect the electrical wiring: Safely connect the fan’s wiring to your RV’s electrical system, following the manufacturer’s instructions for proper connections.
- Test the fan: Once installed, turn on the fan to ensure it operates correctly and check for any air leaks around the installation area.
Choosing the right location for your RV roof fan is crucial; consider areas where airflow is optimal, such as near the kitchen or bathroom, to enhance ventilation and reduce humidity effectively.
Gathering necessary tools and materials in advance streamlines the installation process; essential items include a drill, screws, a screwdriver, and sealant to ensure a secure and weatherproof installation.
If you’re replacing an old fan, remove it carefully to avoid damaging the roof; clean the surface thoroughly to ensure a good seal with the new fan.
During installation, position the new fan properly and secure it with screws to ensure stability; this step is vital to prevent any movement that could lead to damage over time.
Applying a high-quality sealant around the fan’s edges is essential for waterproofing; this step protects your RV from leaks that could lead to water damage.
Connecting the electrical wiring requires attention to detail; follow the manufacturer’s guidelines closely to ensure a safe and functional connection.
Finally, testing the fan after installation is important; this allows you to verify that it operates efficiently and that there are no leaks around the installation area, ensuring you have a reliable ventilation solution for your RV.
What Maintenance Steps Can Prolong My RV Roof Fan’s Life?
To prolong your RV roof fan’s life, consider the following maintenance steps:
- Regular Cleaning: Keeping your roof fan clean is essential for its longevity. Dust, dirt, and debris can accumulate on the blades and motor, leading to reduced efficiency and potential damage over time.
- Inspecting Seals and Gaskets: Regularly check the seals and gaskets around the fan for any signs of wear or damage. Proper seals prevent water leaks, which can lead to corrosion and malfunctioning of the fan components.
- Lubricating Moving Parts: Applying lubricant to the fan’s moving parts can help reduce friction and wear. This should be done periodically, following the manufacturer’s recommendations to ensure optimal performance.
- Checking Electrical Connections: Inspect the electrical connections for any signs of corrosion or loose wires. Poor electrical connections can lead to intermittent operation or complete failure of the fan.
- Testing the Fan Operation: Periodically test the fan to ensure it operates smoothly at all speeds. If you notice any unusual noises or vibrations, it may indicate a need for repair or adjustment.
- Covering the Fan: When not in use, consider covering the fan with a protective cover. This can help shield it from the elements, reducing the risk of wear from sun exposure or rain.